Upload Data
The bulk upload feature lets you import large amounts of data into ClassBuddy using CSV files — far faster than entering records one by one. Use it to get your school set up quickly, or to make bulk changes to existing data.
You need the data_import:create permission to create new uploads. See Roles & Permissions for details.
Go to Menu > Uploads to see your upload history.
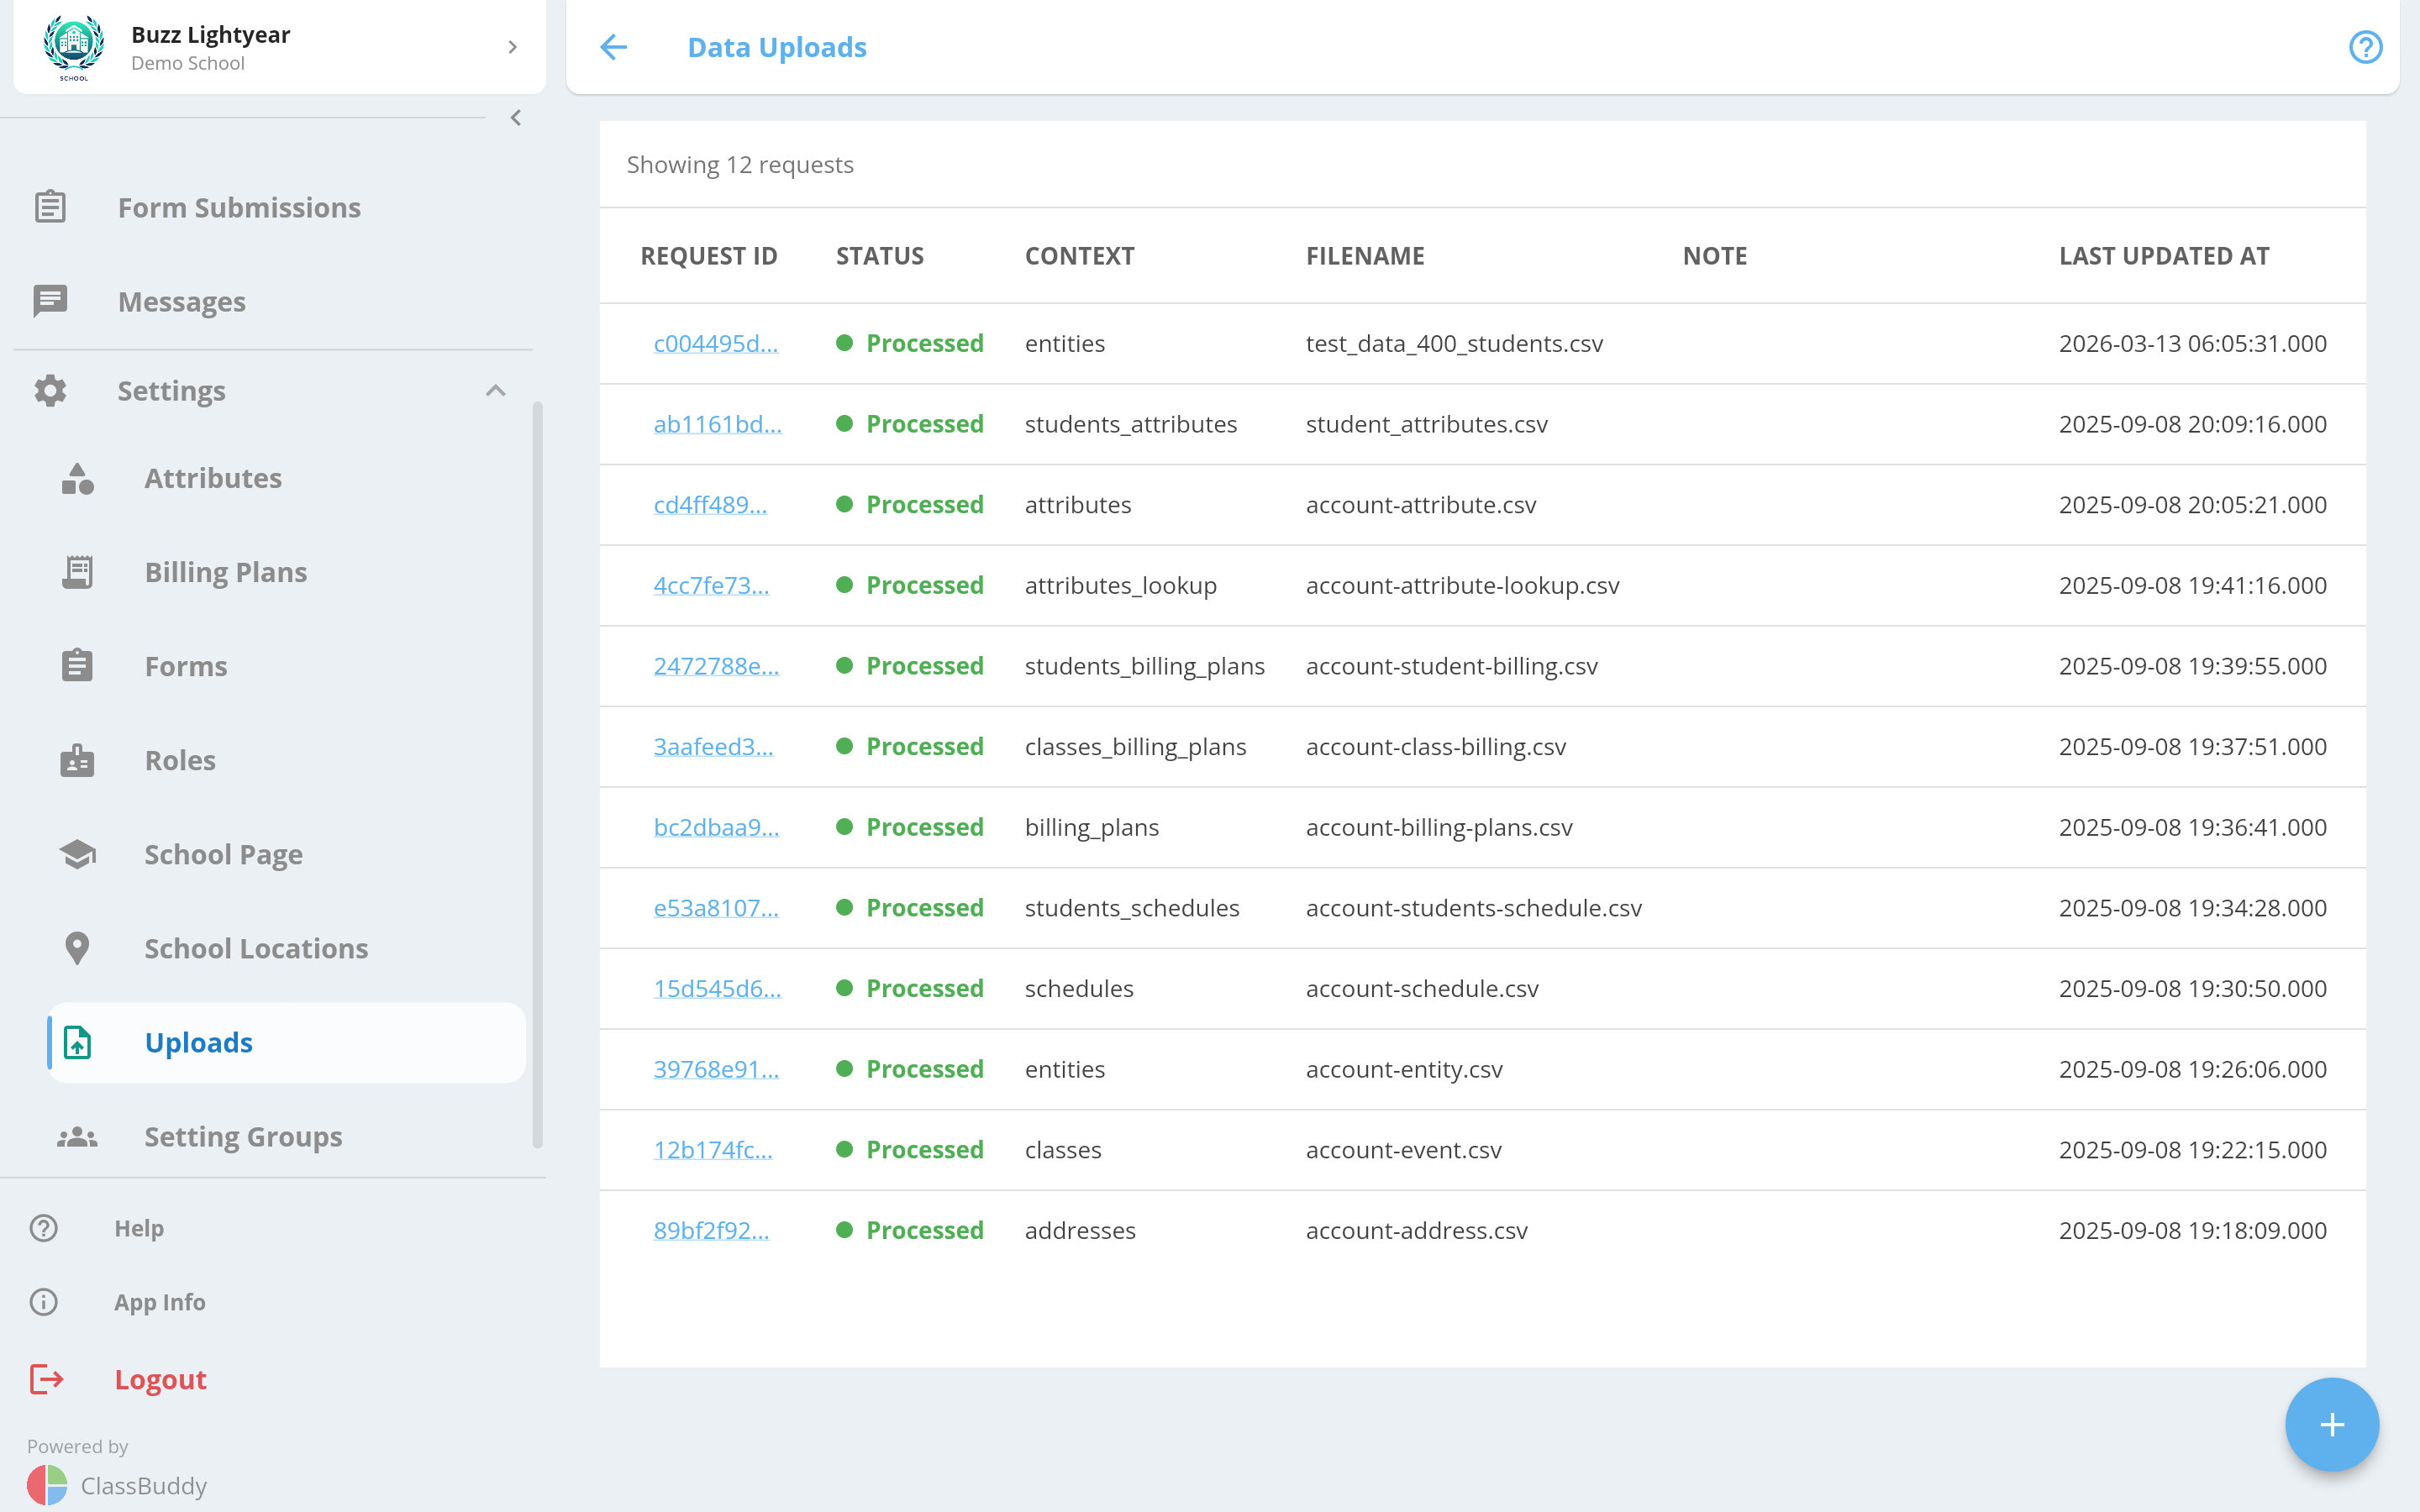
The list shows all past uploads with the following columns:
| Column | Description |
|---|---|
| Request ID | Unique identifier for the upload request — tap to view details |
| Status | Current processing status |
| Context | The type of data uploaded |
| Filename | Name of the uploaded CSV file |
| Note | Any notes attached to the upload |
| Last Updated | Timestamp of the last status change |
Upload Statuses
Each upload goes through the following statuses:
| Status | Meaning |
|---|---|
| pending_processing | Upload received and queued for processing |
| validated | Dry run completed successfully — no data was imported |
| processed | Data successfully imported |
| failed | Validation or import failed — tap to view errors |
Creating a New Upload
Tap the + button to open the upload screen.
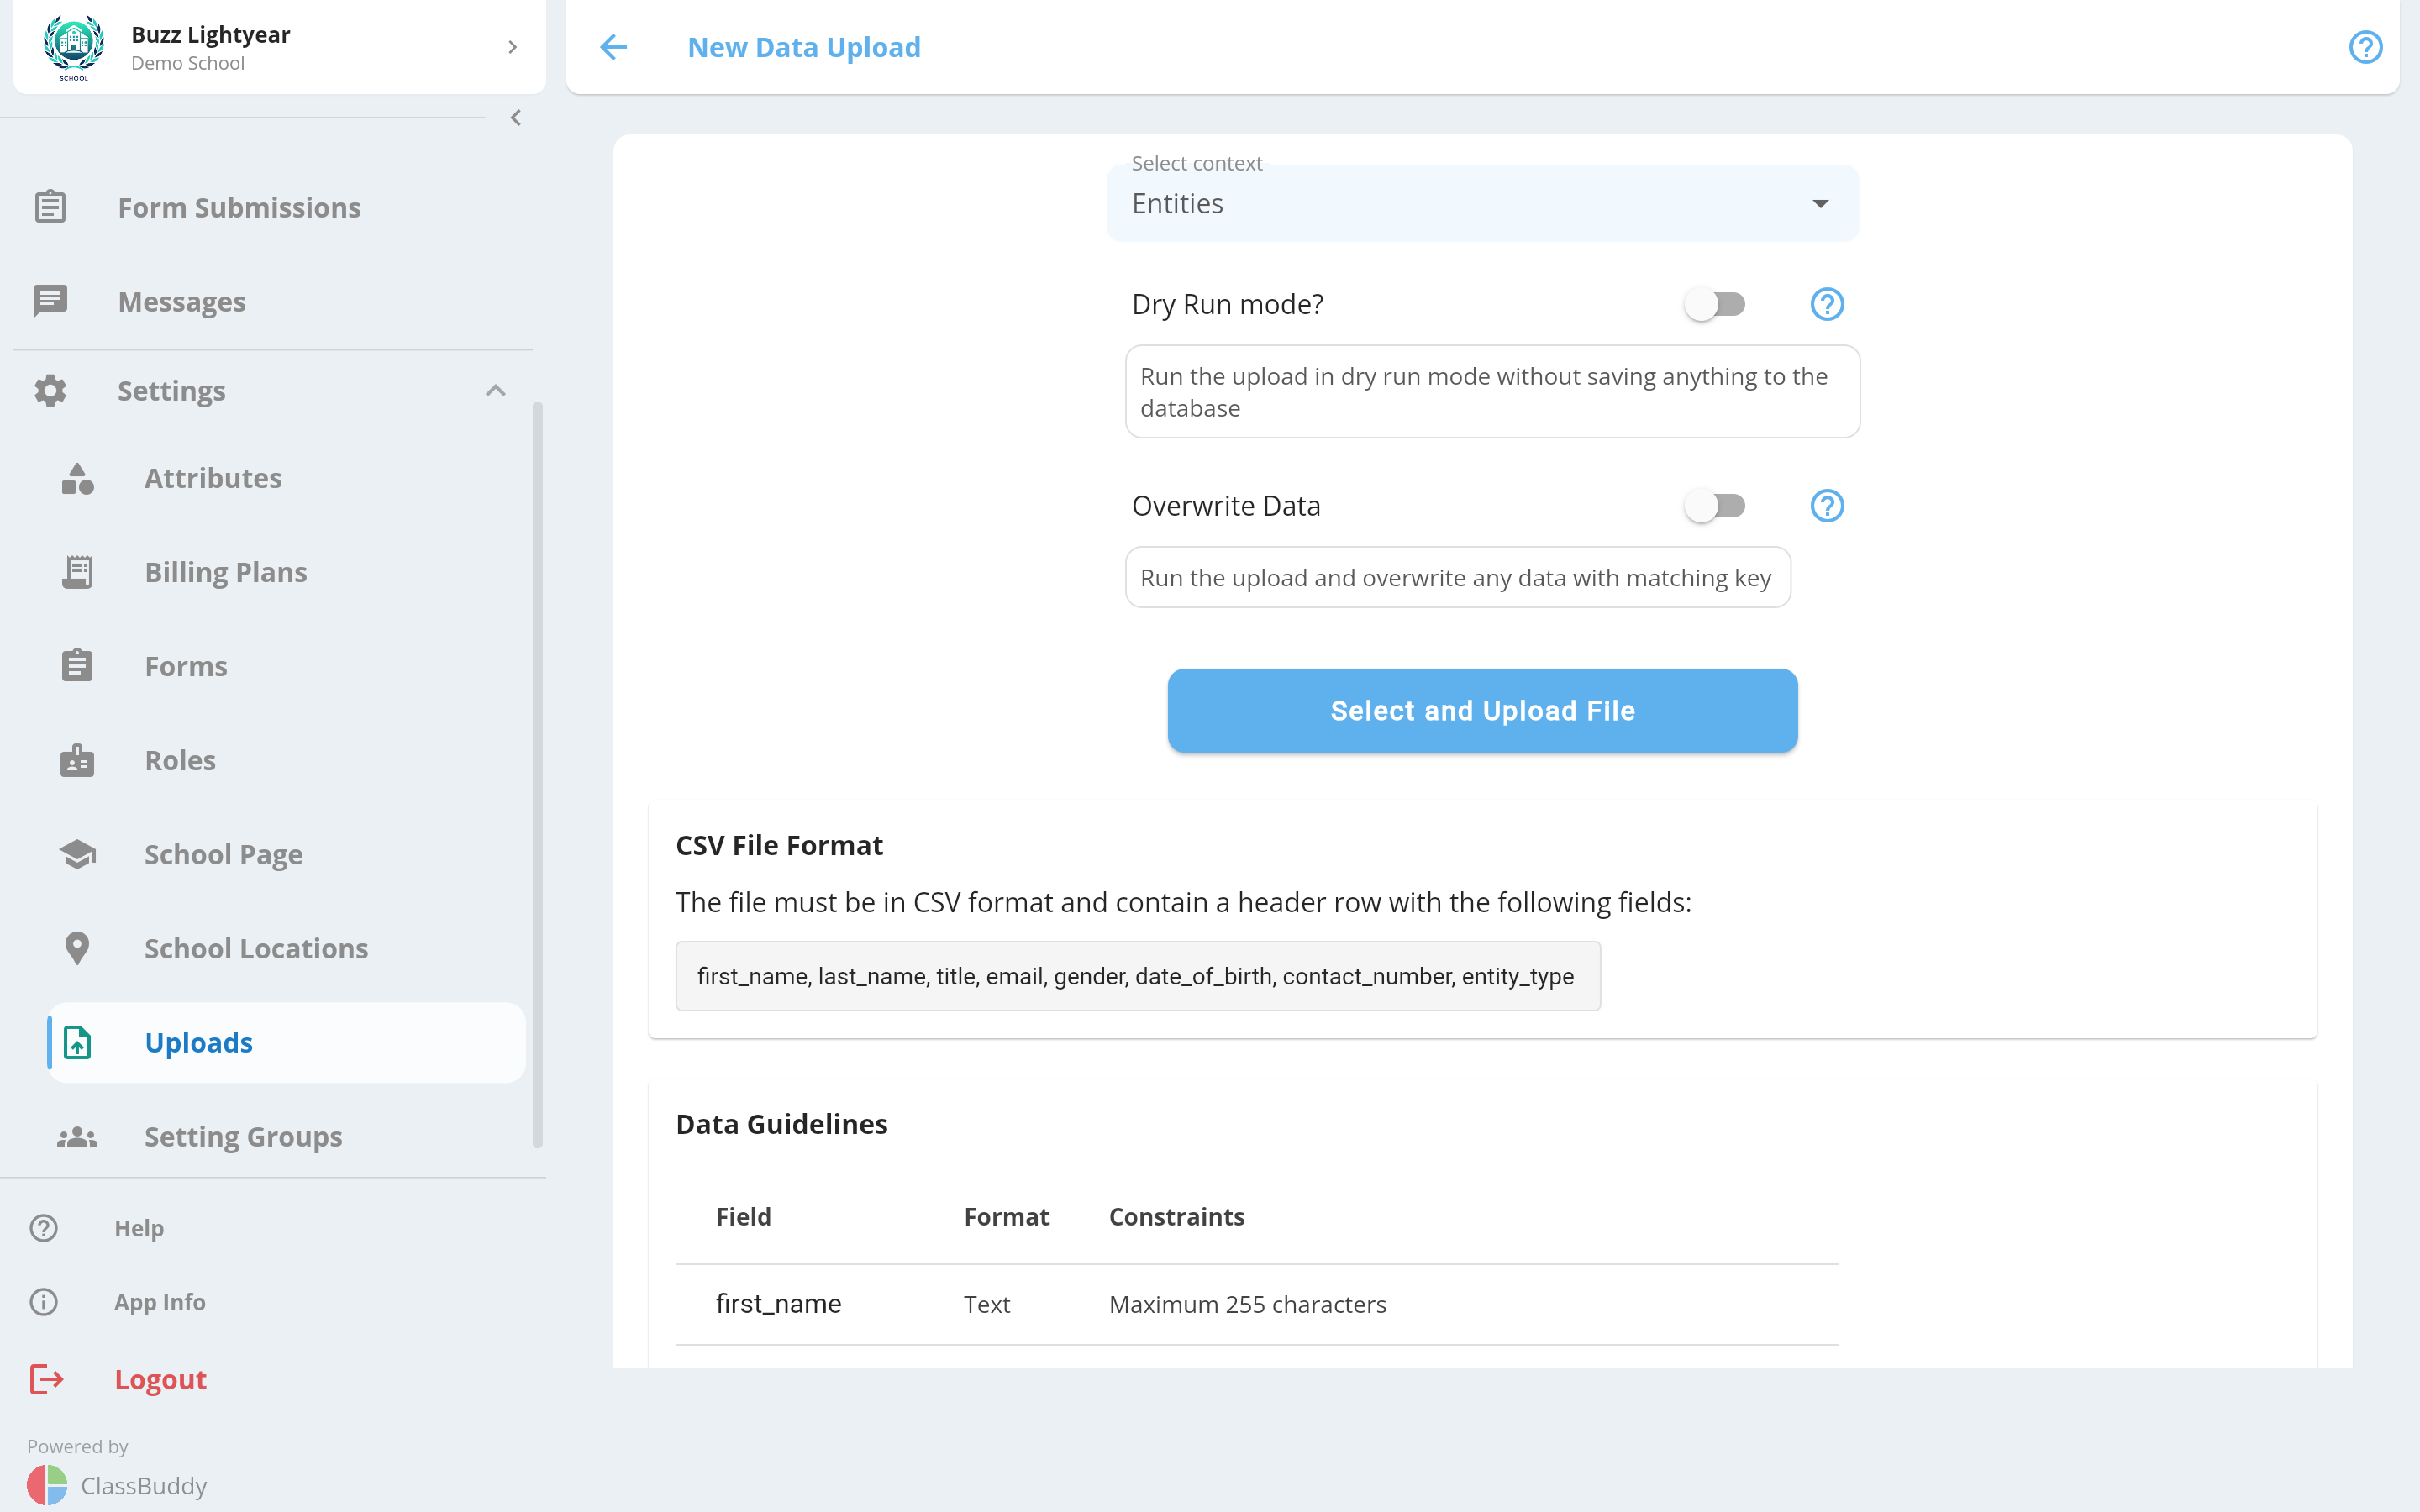
- Select context — choose the type of data you are uploading (see Supported Upload Types below).
- Dry Run mode — toggle on to validate the file without importing any data. Use this to catch errors before committing.
- Overwrite Data — toggle on to replace existing values with data from the CSV. This option is hidden when Dry Run mode is on.
- Review the CSV Format Guide that appears below — it shows the required fields, data guidelines, an example row, and tips specific to the selected context.
- Tap Select and Upload File to choose a
.csvfile from your device. The file is uploaded and processed automatically.
Always run a Dry Run first. If the validation passes, turn off Dry Run and upload again to import the data for real.
CSV Format Guide
Once you select a context, the app displays a built-in format guide with five expandable sections:
- File Format — lists required and optional fields
- Data Guidelines — table showing each field name, expected format, and constraints
- Example — a sample CSV row for that context
- Tips — best practices for that upload type
- Additional validation tips — common mistakes to avoid
Use the ClassBuddy Google Spreadsheet Template to prepare your data, then export each sheet as a CSV file.
Viewing Upload Results
Tap any Request ID in the list to open the upload detail view.
If the upload failed, you will see a list of validation errors grouped by field. Each error shows which row and field caused the problem, so you can fix the CSV and re-upload.
Supported Upload Types
The following contexts are available:
| Context | What it imports |
|---|---|
| entities | Students and teachers (shared base record) |
| addresses | Physical locations used by the school |
| classes | Class definitions |
| schedules | Schedules linked to classes |
| students_classes | Links between students and classes |
| students_schedules | Links between students and schedules |
| attributes | Custom attributes for students |
| attributes_lookup | Lookup values for dropdown-type attributes |
| students_attributes | Attribute values assigned to students |
| billing_plans | Billing plan definitions |
| classes_billing_plans | Links between billing plans and classes |
| students_billing_plans | Billing plans assigned to students |
| students_contacts | Contacts (parents/guardians) linked to students |
Recommended Import Order
If you are setting up a new school, import data in this order to avoid dependency errors:
- Addresses
- Classes
- Teachers (via entities)
- Schedules
- Students (via entities)
- Contacts
- Student Schedules
- Student Classes
- Billing Plans
- Class Billing Plans
- Student Billing Plans
- Attribute Lookups
- Attributes
- Student Attributes