Schedules
A schedule is a recurring (or one-off) time slot under a class. A class can have many schedules, but each schedule belongs to exactly one class. Students and teachers can be linked at either the class level or the schedule level.
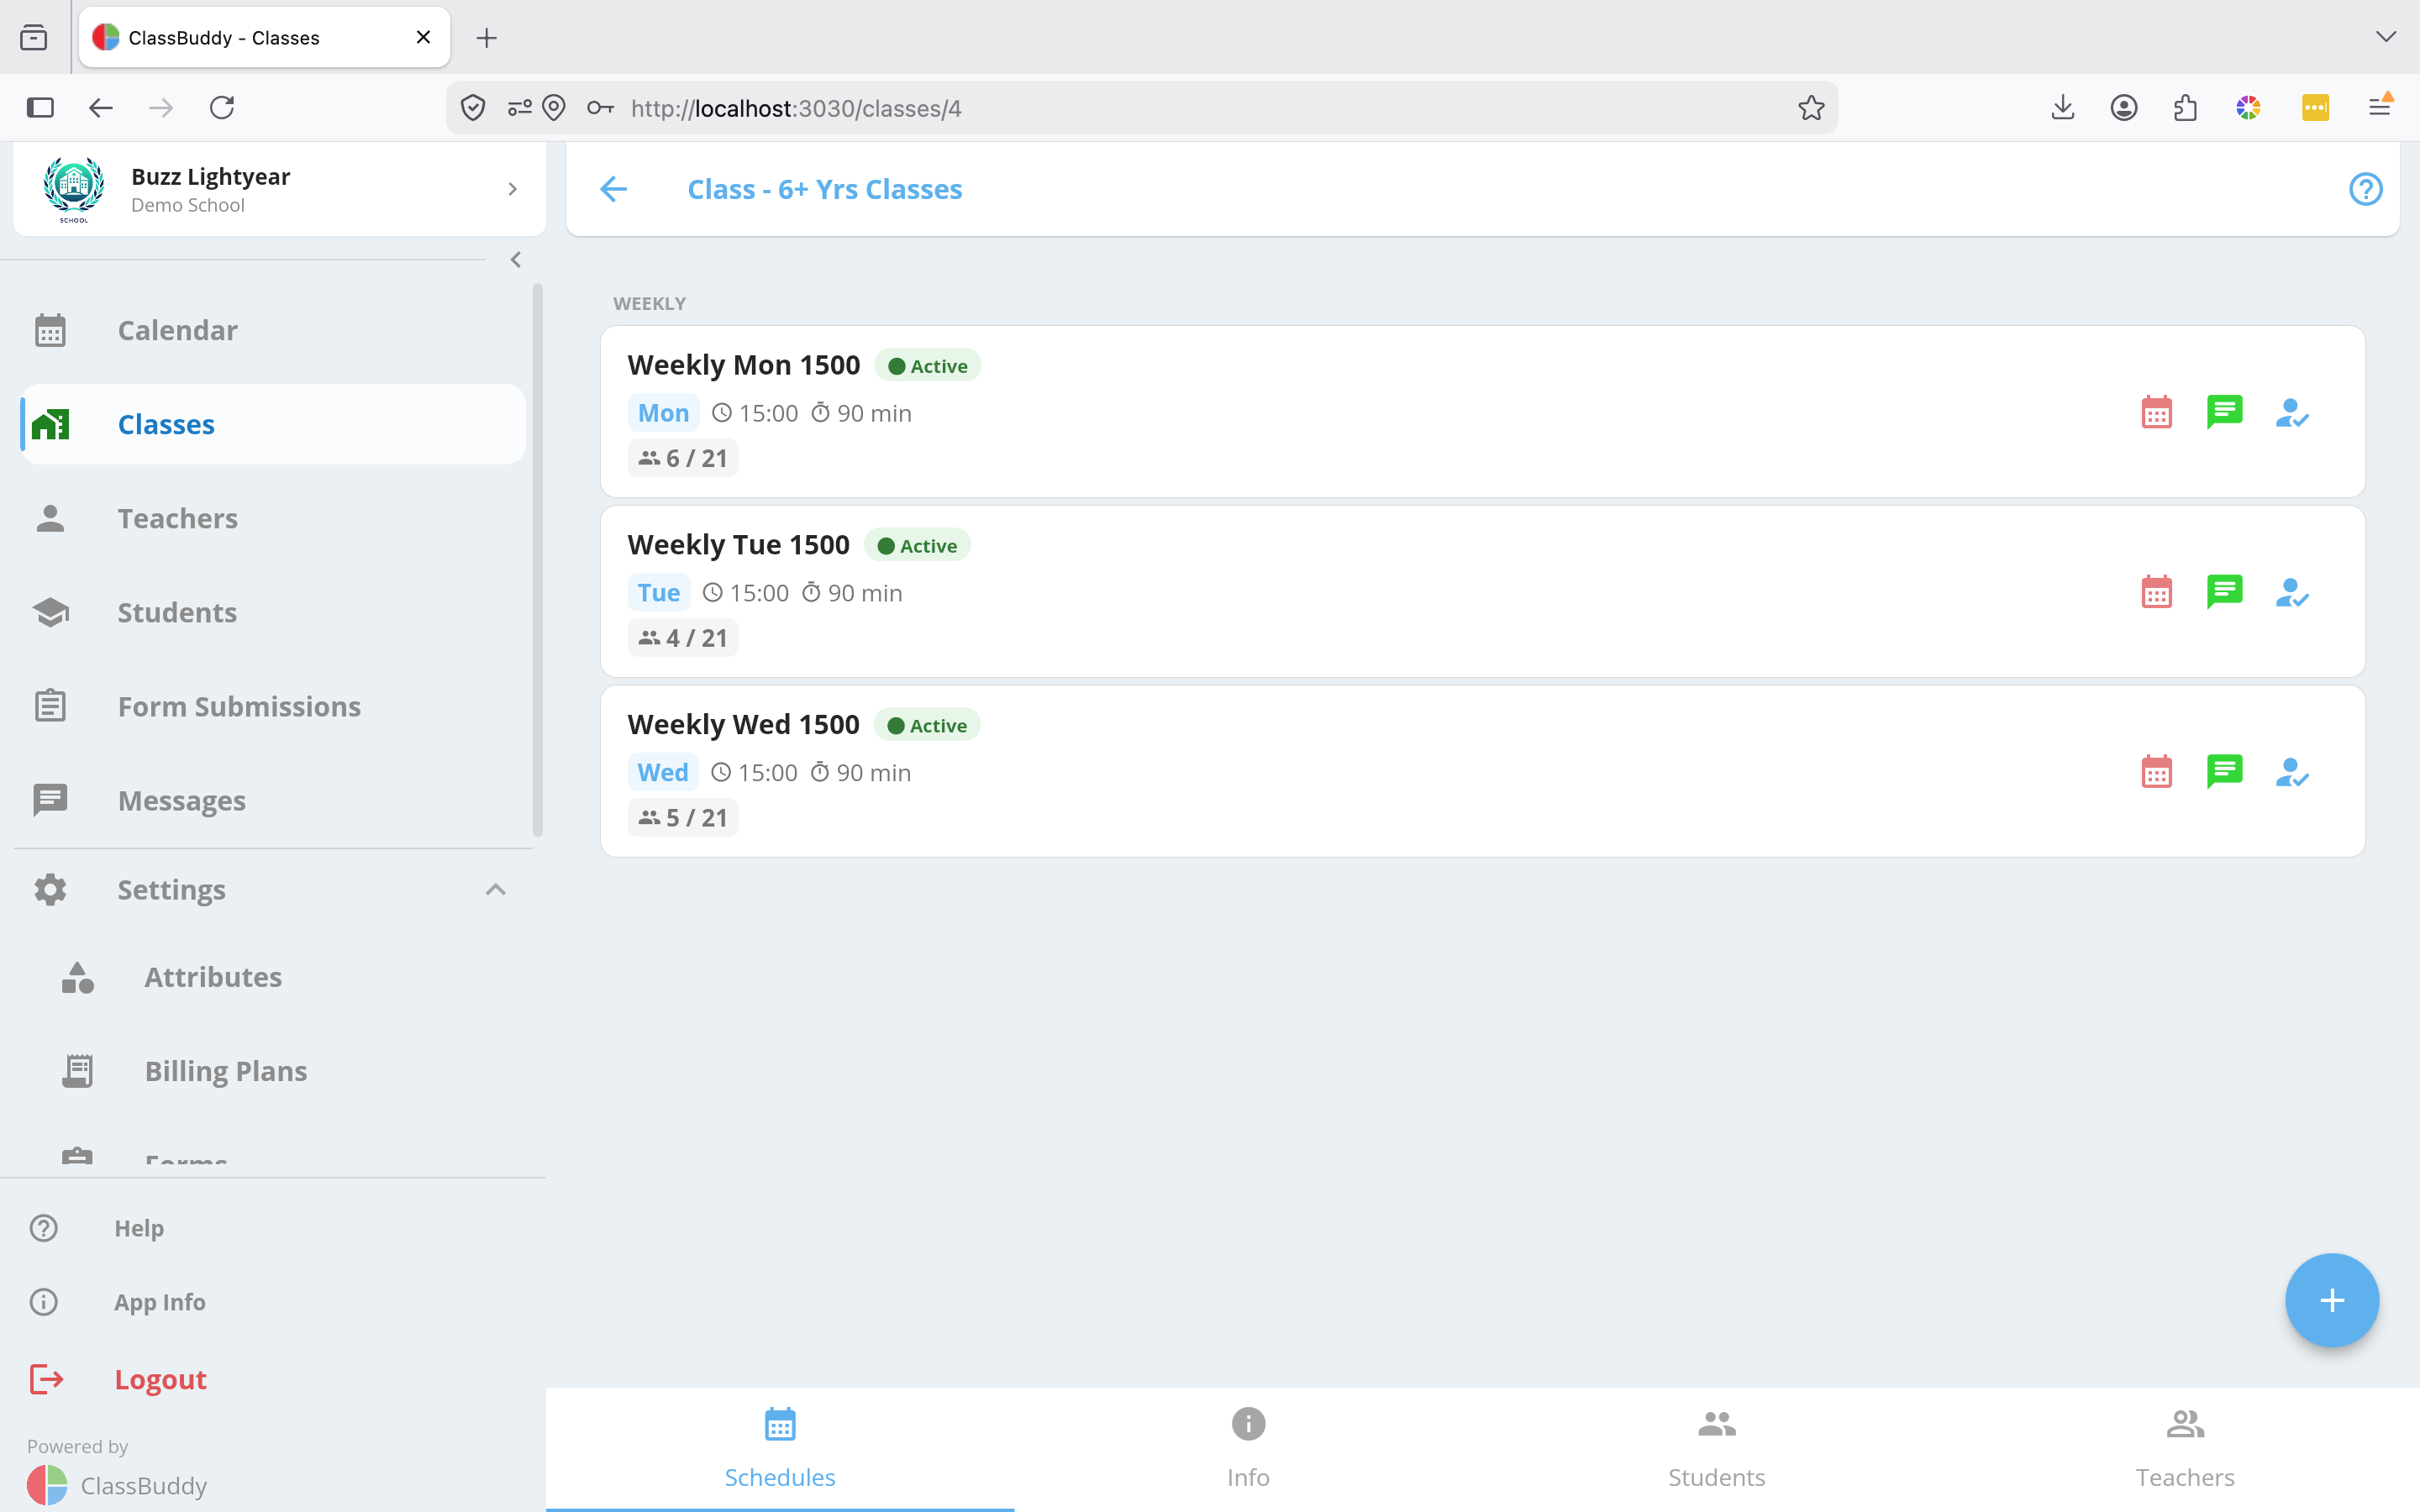
View Schedules
Go to Classes > [Class name]. The Schedules tab is selected by default and lists all schedules for that class, sorted by frequency, then day of week, then start time.
Create a Schedule
From the Schedules tab, tap the + button to open the Create Schedule form.
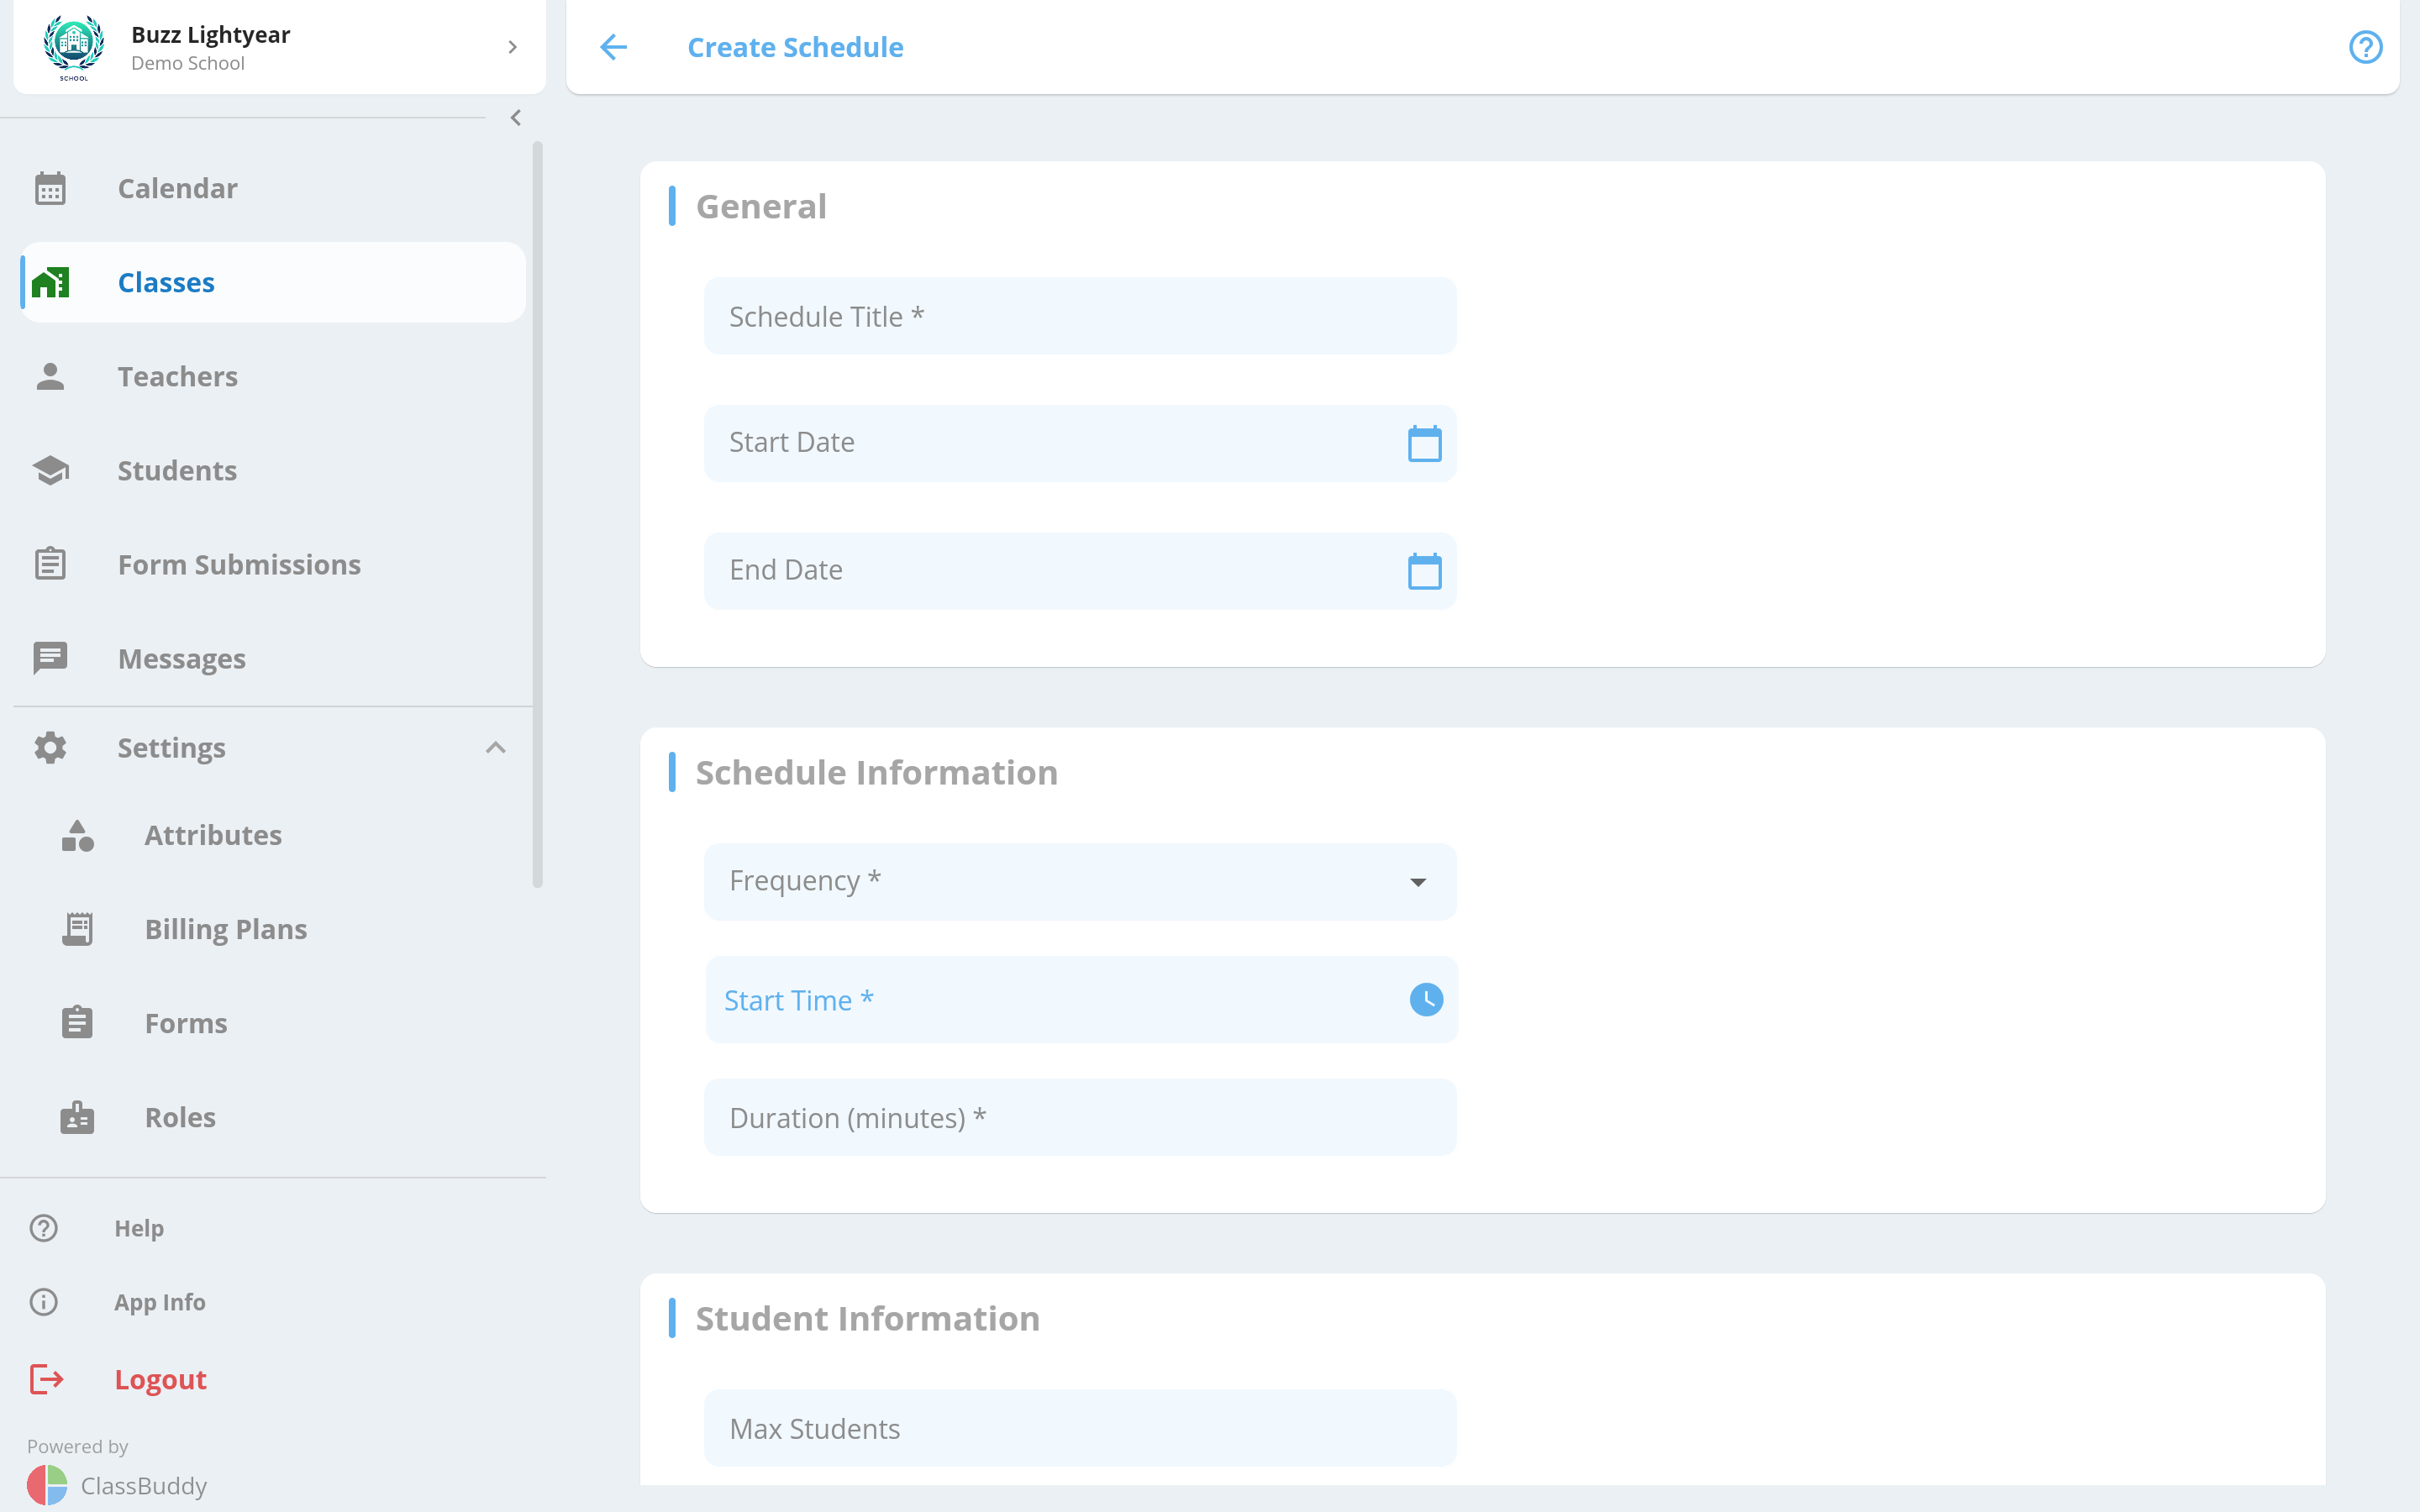
| Field | Required | Description |
|---|---|---|
| Title | Yes | Friendly name for the schedule |
| Frequency | Yes | How often the schedule repeats — see Frequency options below |
| Start Time | Yes | Time the schedule starts (HH:MM) |
| Duration | Yes | Length of the session in minutes |
| Max Students | Yes | Maximum number of students allowed. When this limit is reached, the schedule is hidden from the sign-up form. |
| Start Date | No | Date from which the schedule is active |
| End Date | No | Date after which the schedule stops |
| Inherit Students from Class | No | When on, all students linked to the class are automatically added to this schedule |
| Inherit Teachers from Class | No | When on, all teachers linked to the class are automatically added to this schedule |
Frequency Options
Daily
The schedule runs every day, or on specific days of the week. After selecting Daily, choose which days it applies to (e.g. Monday through Friday, or Monday and Wednesday only).
Weekly
The schedule runs on specific days each week. Select one or more days of the week (e.g. Tuesday and Thursday). The schedule will repeat on those days every week.
Monthly
The schedule runs once per month on a specific occurrence of a weekday. After selecting Monthly, choose:
- Which day — e.g. Monday, Wednesday, Friday
- Which occurrence — First / Second / Third / Fourth / Last occurrence of that day in the month
For example, "Second Tuesday" means the schedule runs on the second Tuesday of each month.
Once-off
The schedule runs on a single date only. Use this for one-time events or trial sessions. Set a Start Date to specify when it occurs.
View a Schedule
Go to Classes > [Class] > Schedules tab and tap a schedule to open it. The default view shows the list of students in the schedule.
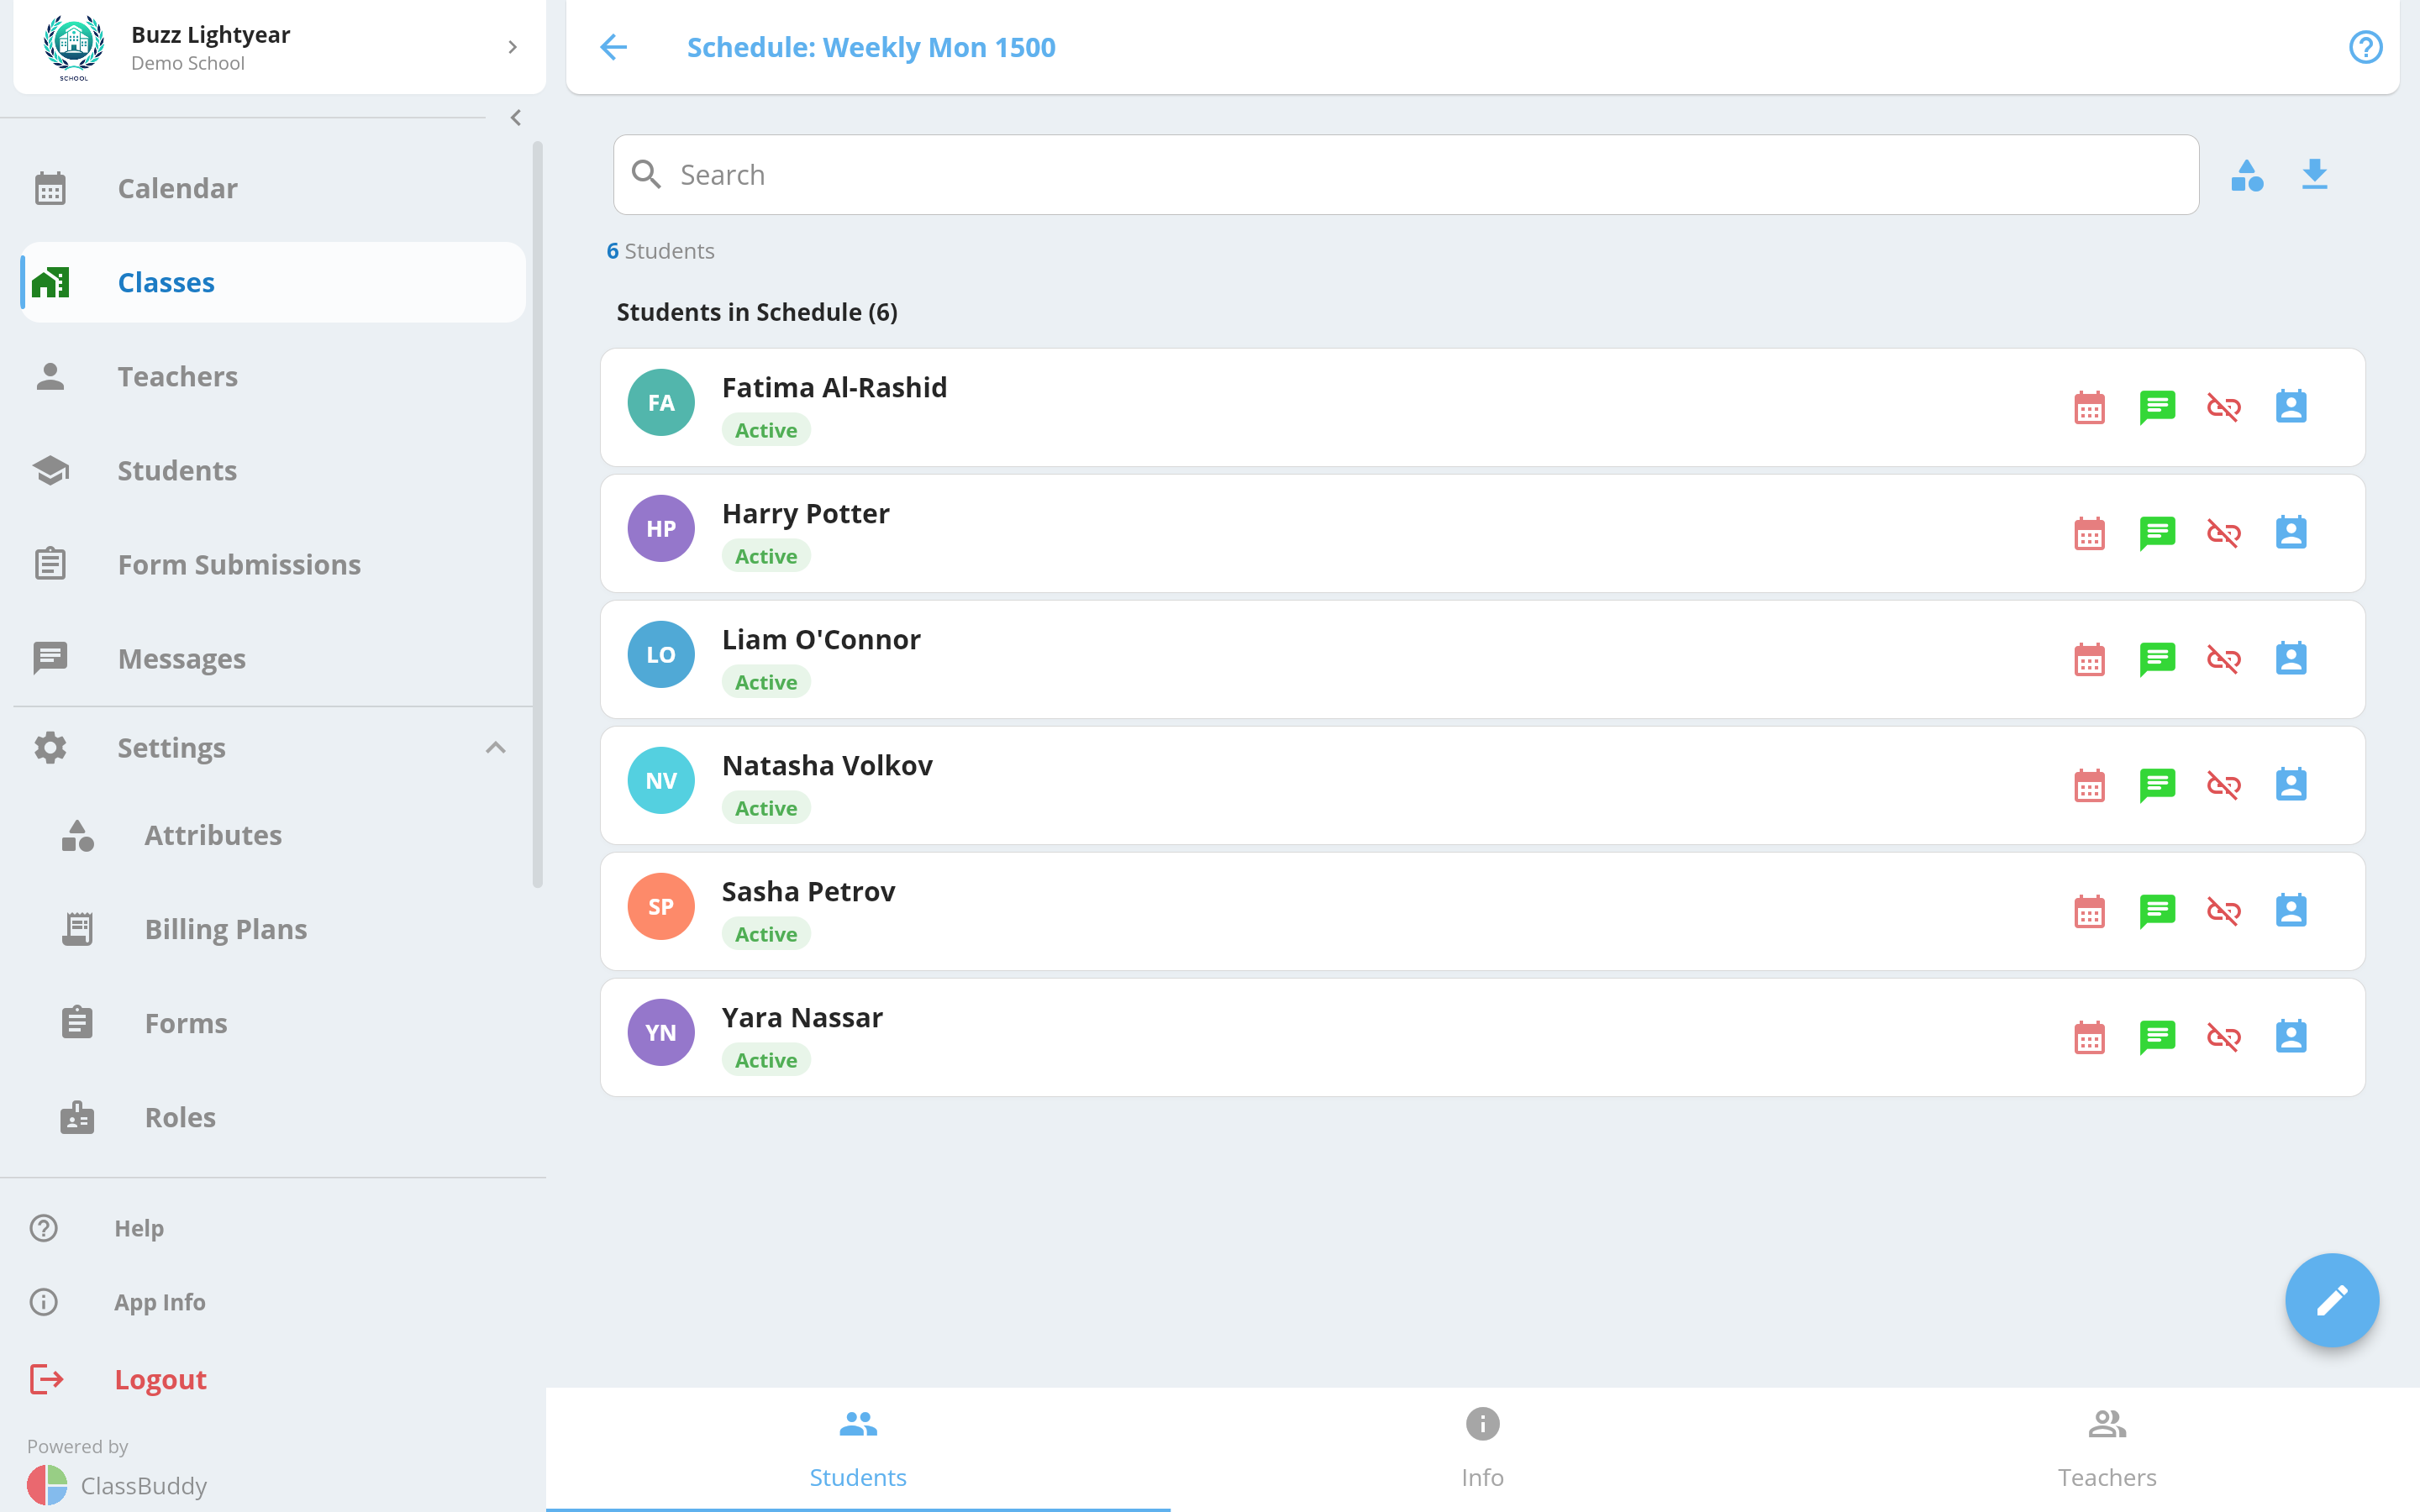
Three tabs are available inside a schedule:
| Tab | Contents |
|---|---|
| Students | Students assigned to this schedule |
| Info | Schedule details and actions |
| Teachers | Teachers assigned to this schedule |
Add Students to a Schedule
From the Students tab, tap + to open the student picker. Select students and tap Add.
Add Teachers to a Schedule
From the Teachers tab, tap + to open the teacher picker. Select teachers and tap Add.
Schedule Info Tab
The Info tab shows the full schedule details including frequency, days, start time, and duration.
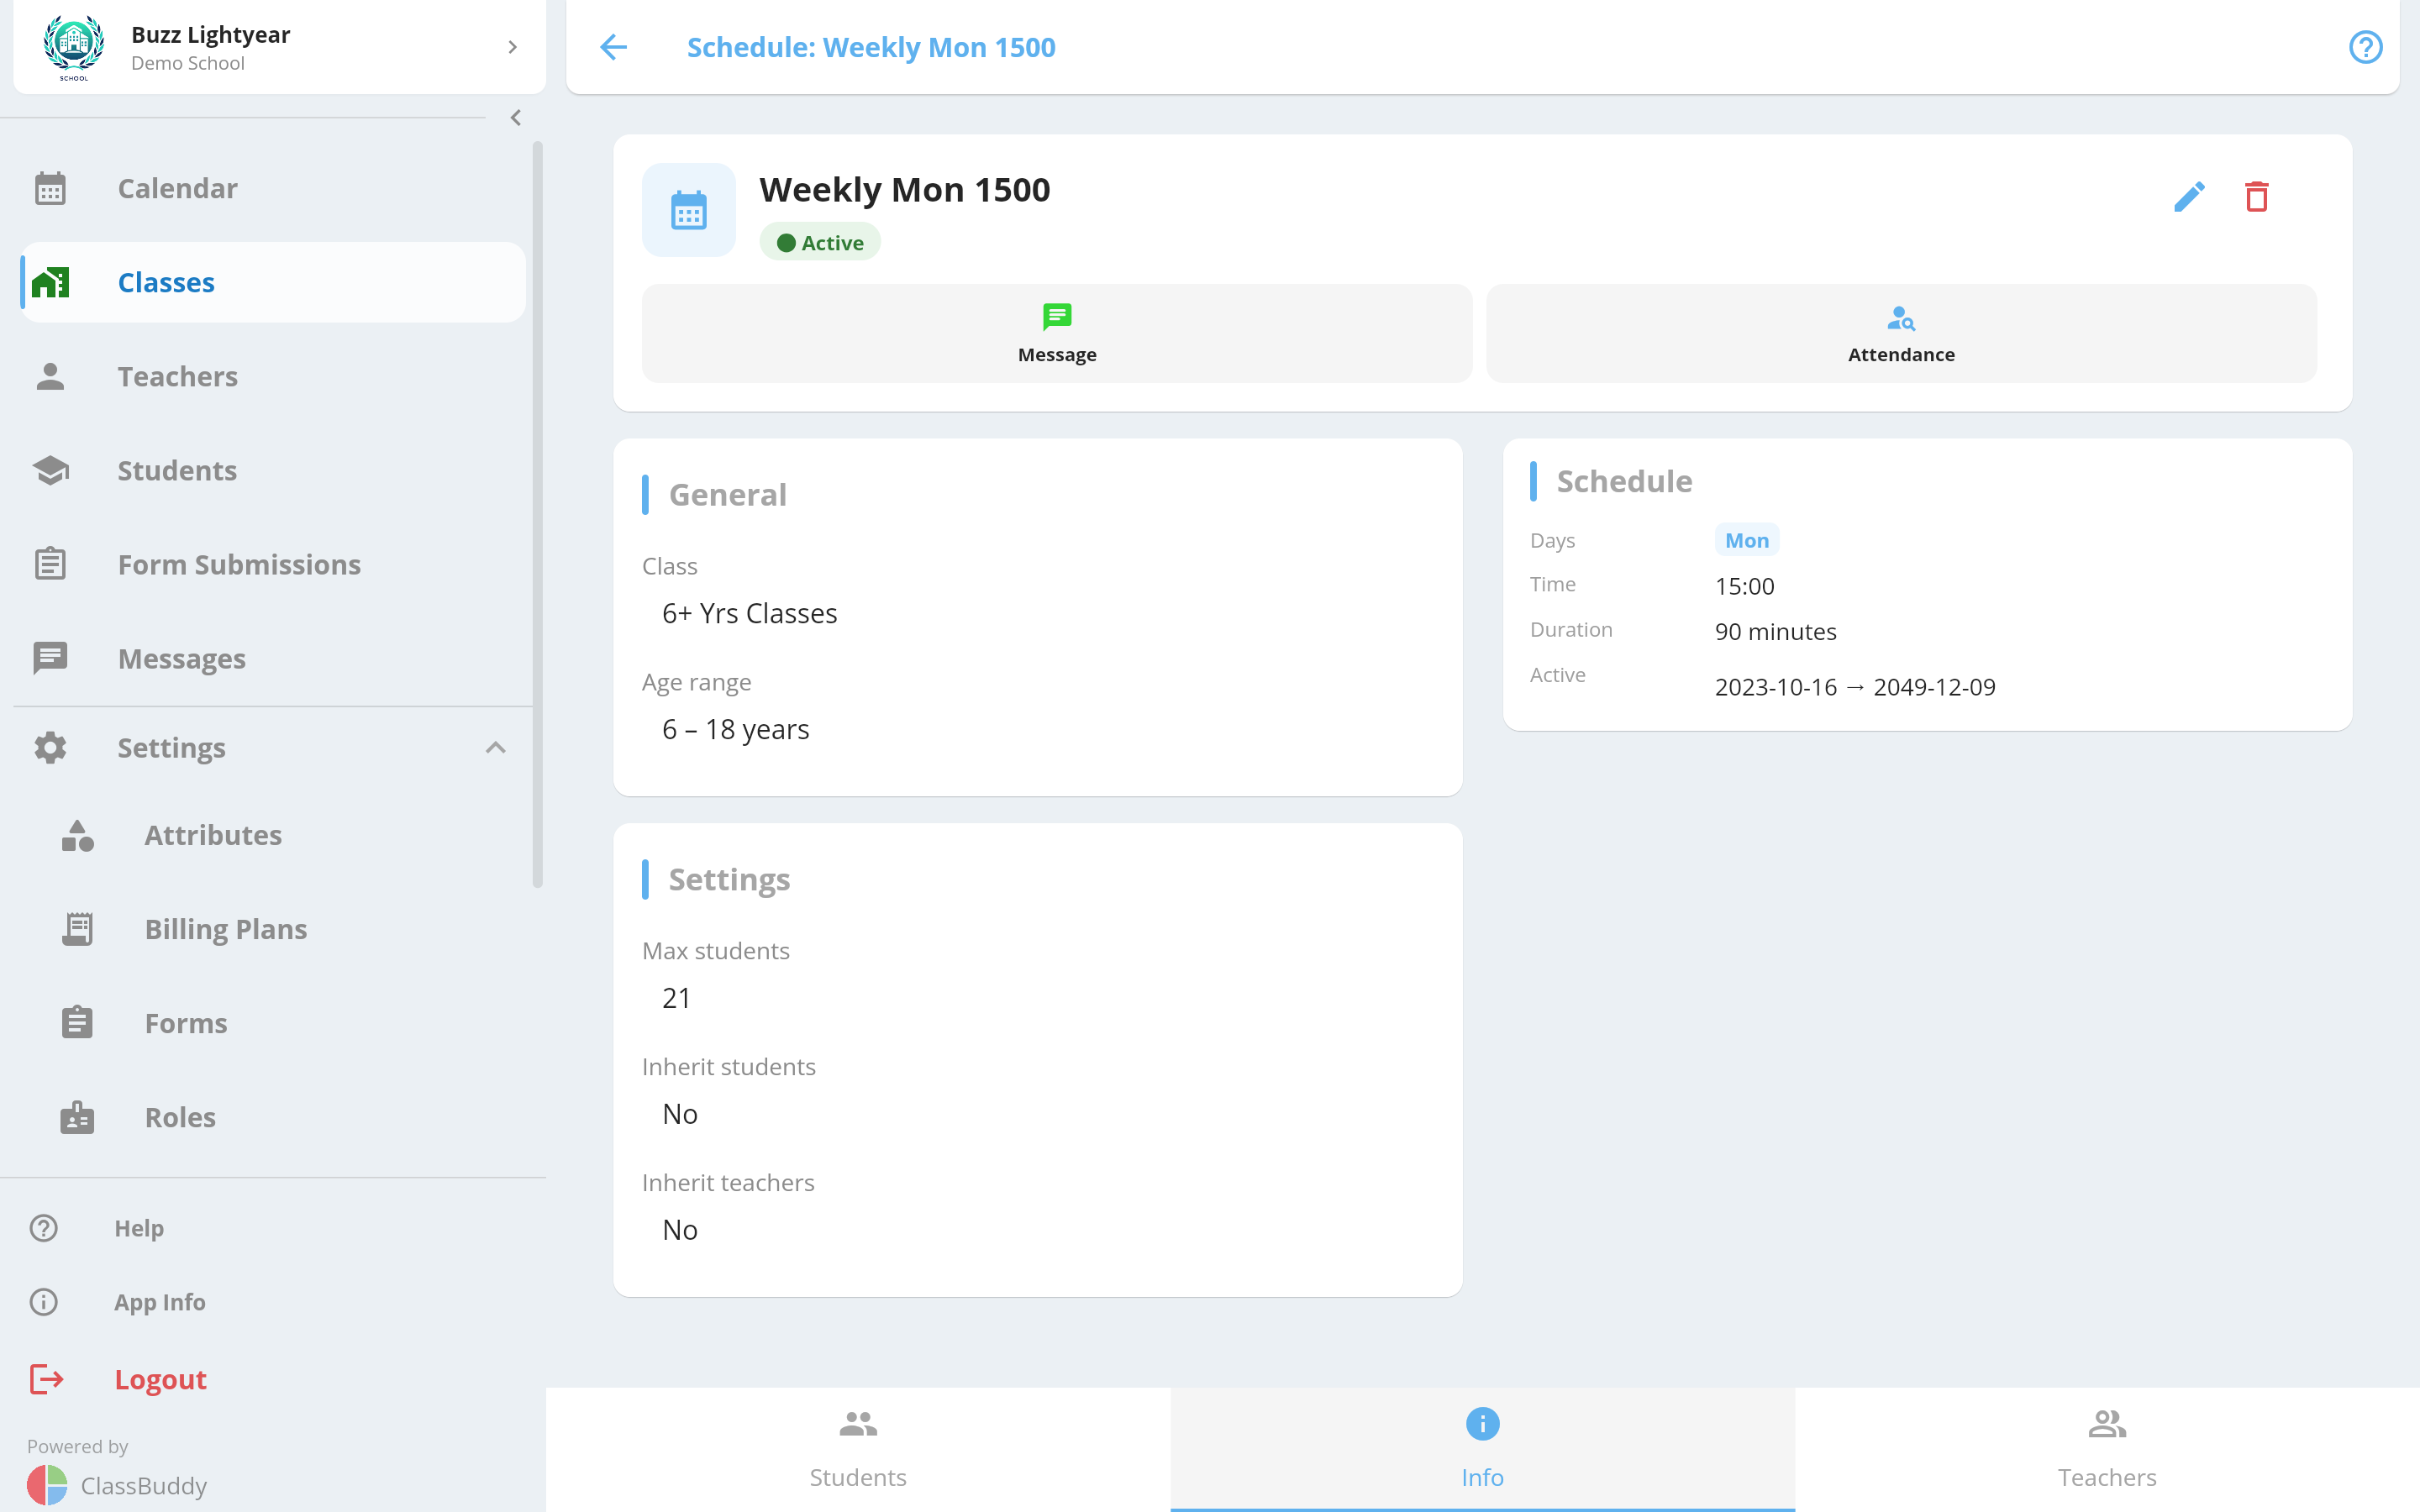
From the menu (three dots) you can:
| Action | Description |
|---|---|
| Calendar | View this schedule on the calendar |
| Message | Send a notification to all students in this schedule |
| Edit | Edit the schedule details |
| Delete | Delete the schedule |
Schedule Capacity
When the number of students in a schedule reaches Max Students, the schedule is automatically hidden from sign-up forms. Existing students are not affected — only new sign-ups via the form are blocked.
To re-open a full schedule to new sign-ups, either increase the Max Students limit or remove a student from the schedule.