Classes
Classes represent the courses or programs offered by your school. Each class can have multiple schedules (time slots), and students and teachers can be linked at either the class or schedule level.
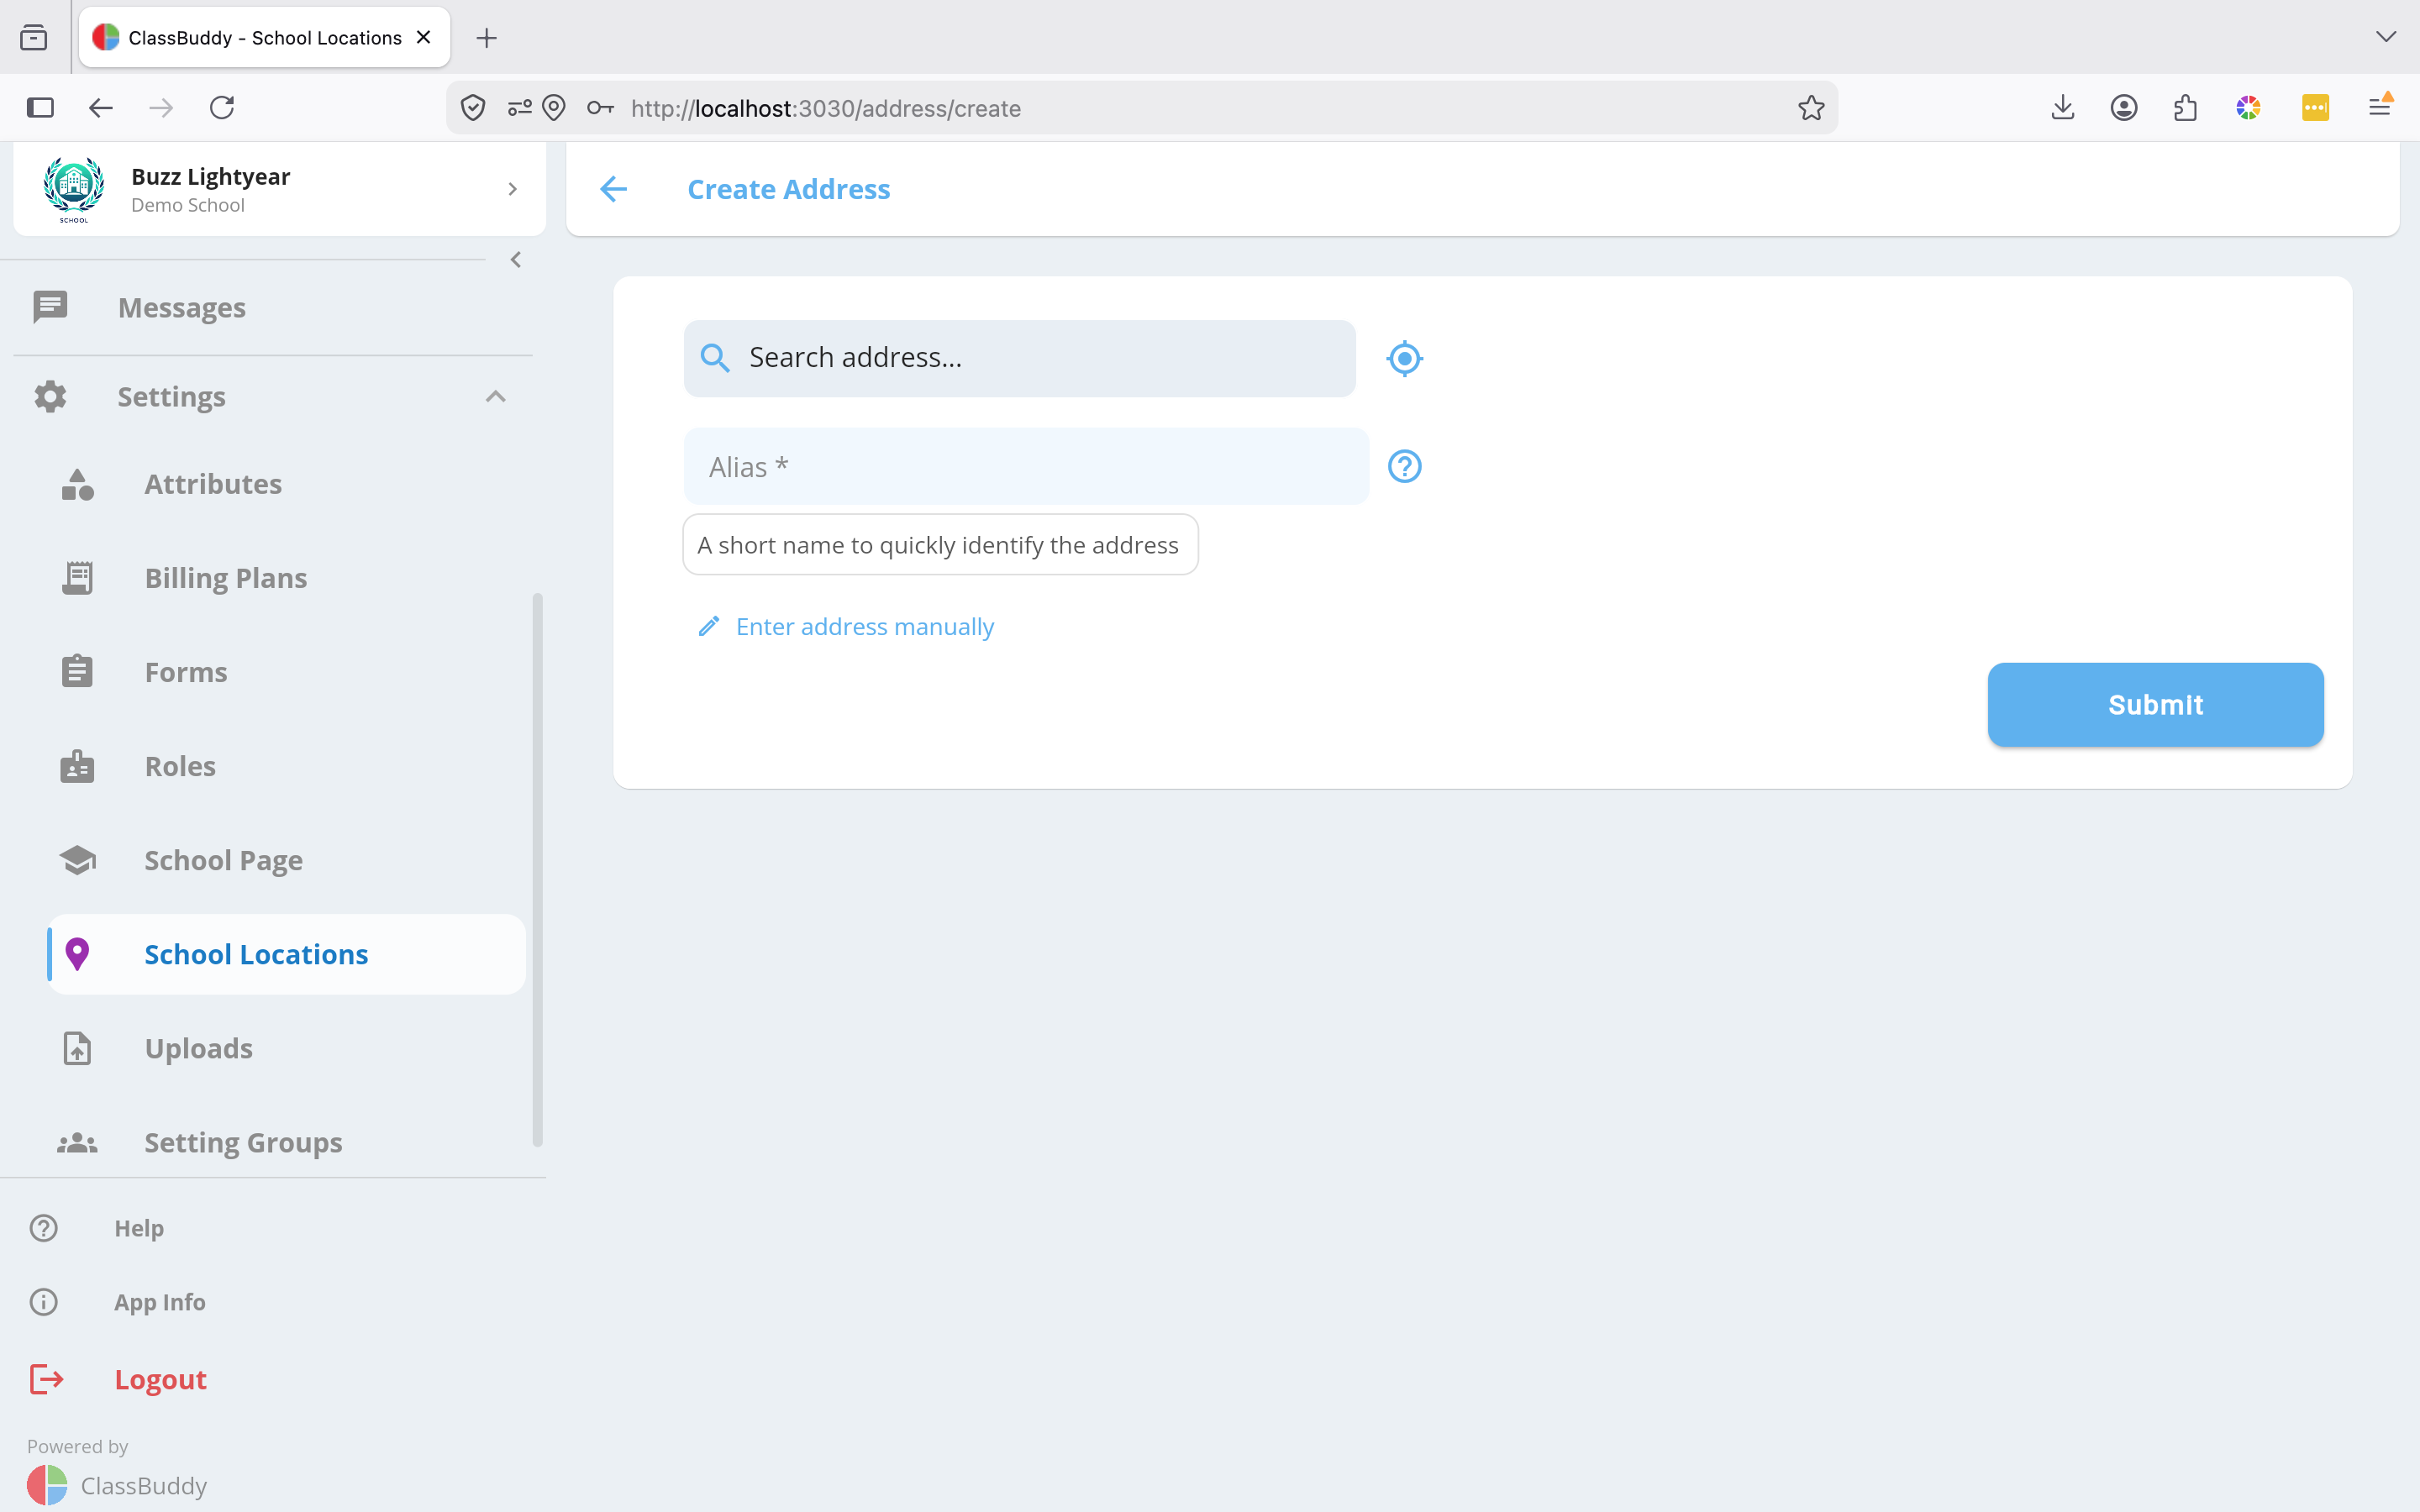
Addresses
Classes must be linked to a location. You can either add locations in advance via Settings > School Locations, or create a new address directly from the Create Class form when you need one.
| Field | Description |
|---|---|
| Alias | A short friendly name for the location (e.g. "Main Hall") |
| Address Line 1 | Street address |
| Address Line 2 | Suite, unit, or building (optional) |
| City | City or suburb |
| Post Code | Postal / ZIP code |
| State | State or province |
| Country | Country |
Viewing Classes
Go to Classes in the main menu. You'll see a list of all classes showing the class name, description, and age range.
Use the search bar at the top to find a class by name. Click on any class to open it.
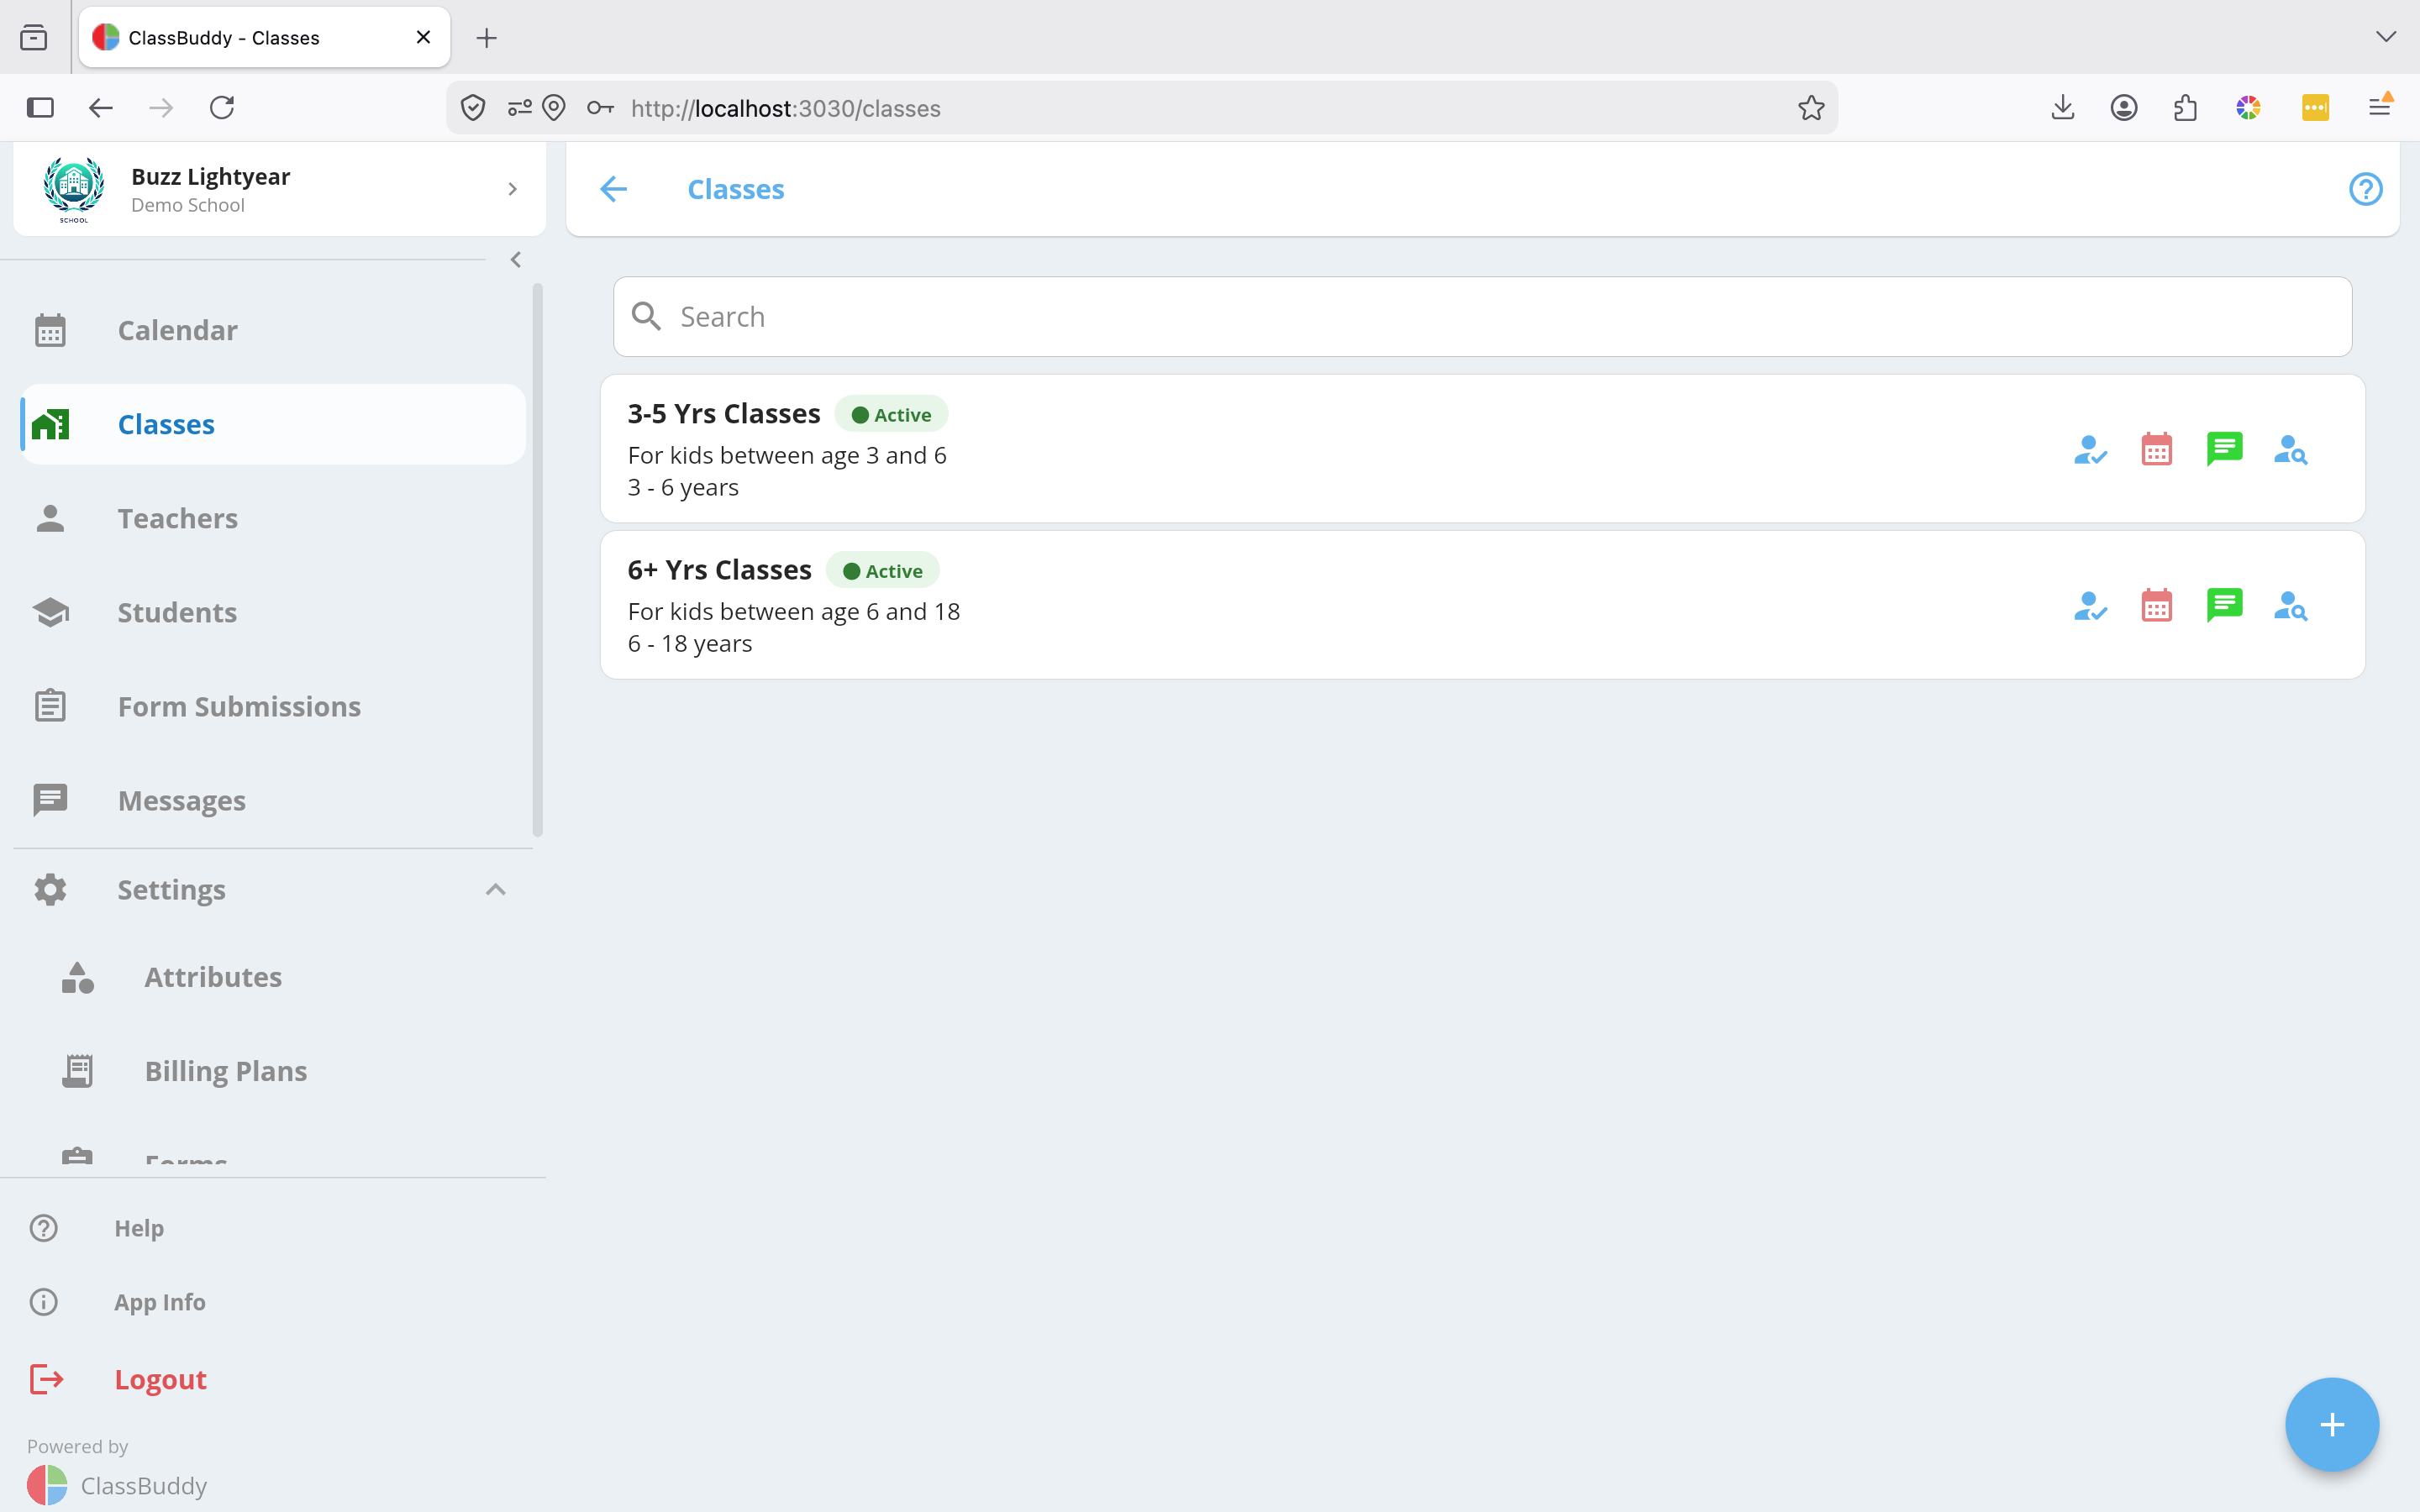
Creating a Class
- Go to Classes and tap the + button in the bottom-right corner.
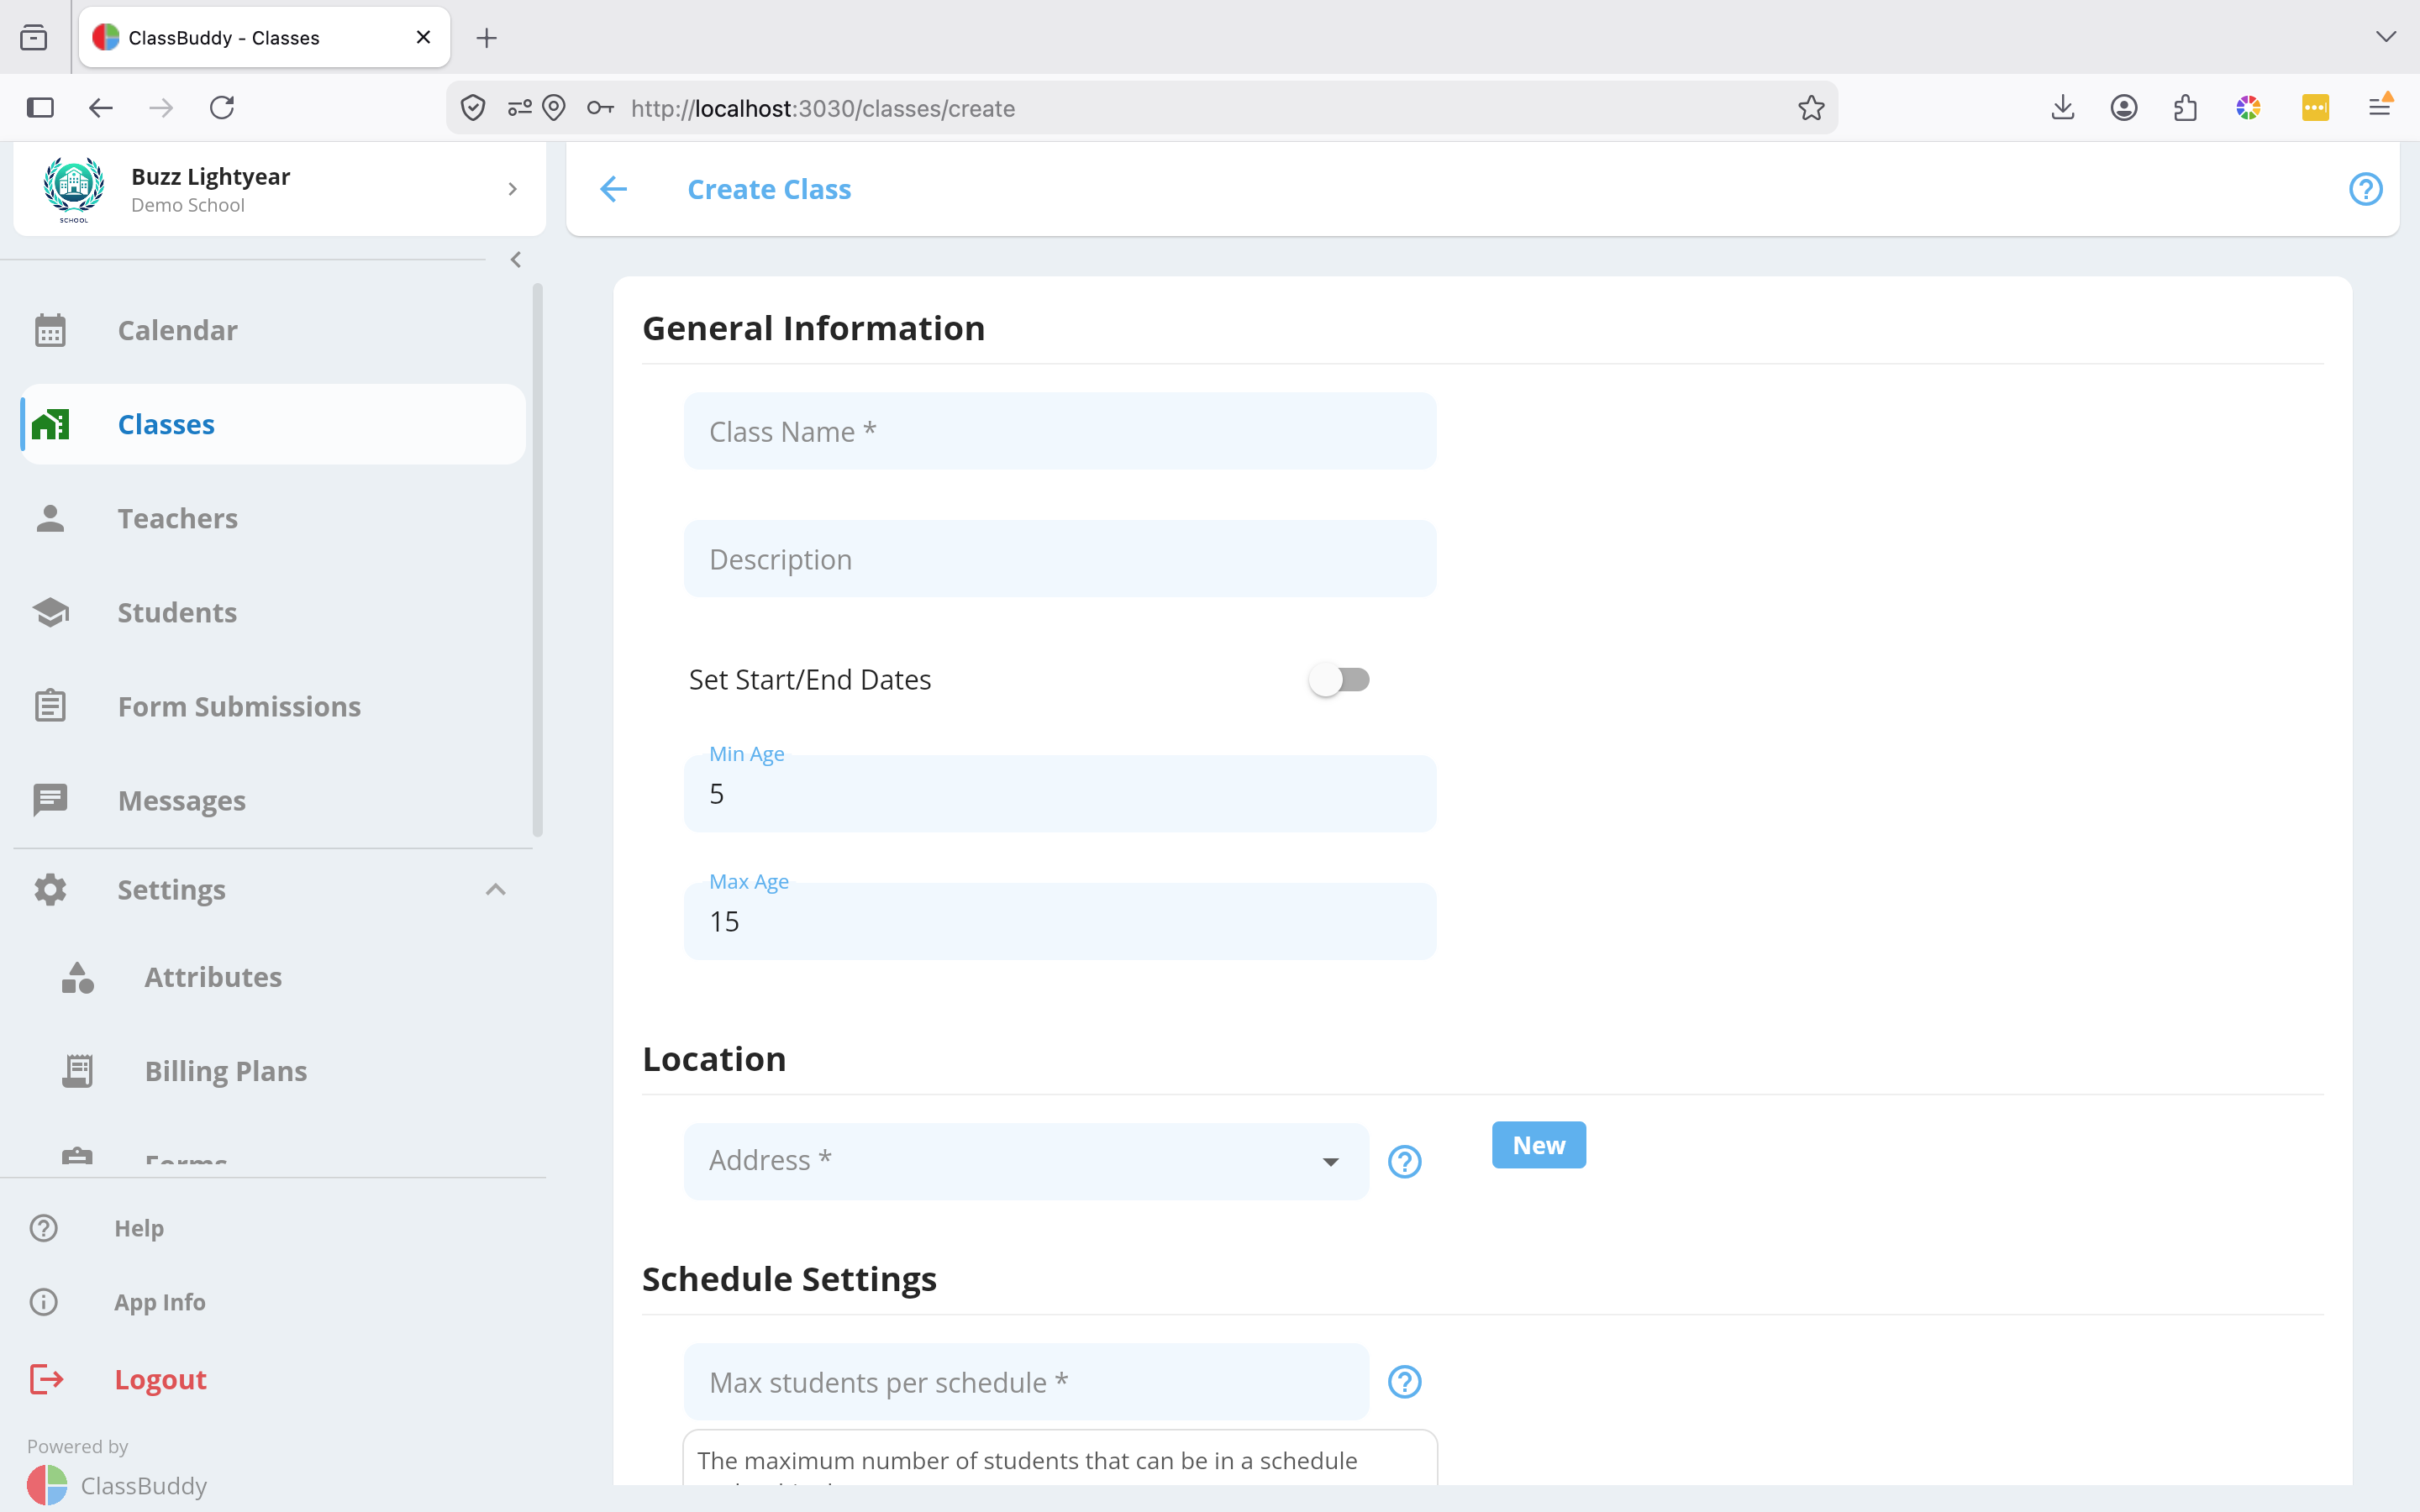
- Fill in the class details:
| Field | Description |
|---|---|
| Class Name | Name of the class |
| Description | Optional details about the class |
| Start Date | When the class begins (optional) |
| End Date | When the class ends (optional) |
| Age Range | Minimum and maximum student age, set with a slider |
| Class Address | Location where the class is held. Tap Create Address to add a new one inline. |
- Configure the class settings:
| Setting | Description |
|---|---|
| Max students per schedule | Cap on how many students can be in any single schedule under this class. When this limit is reached, the schedule is hidden from the sign-up form. |
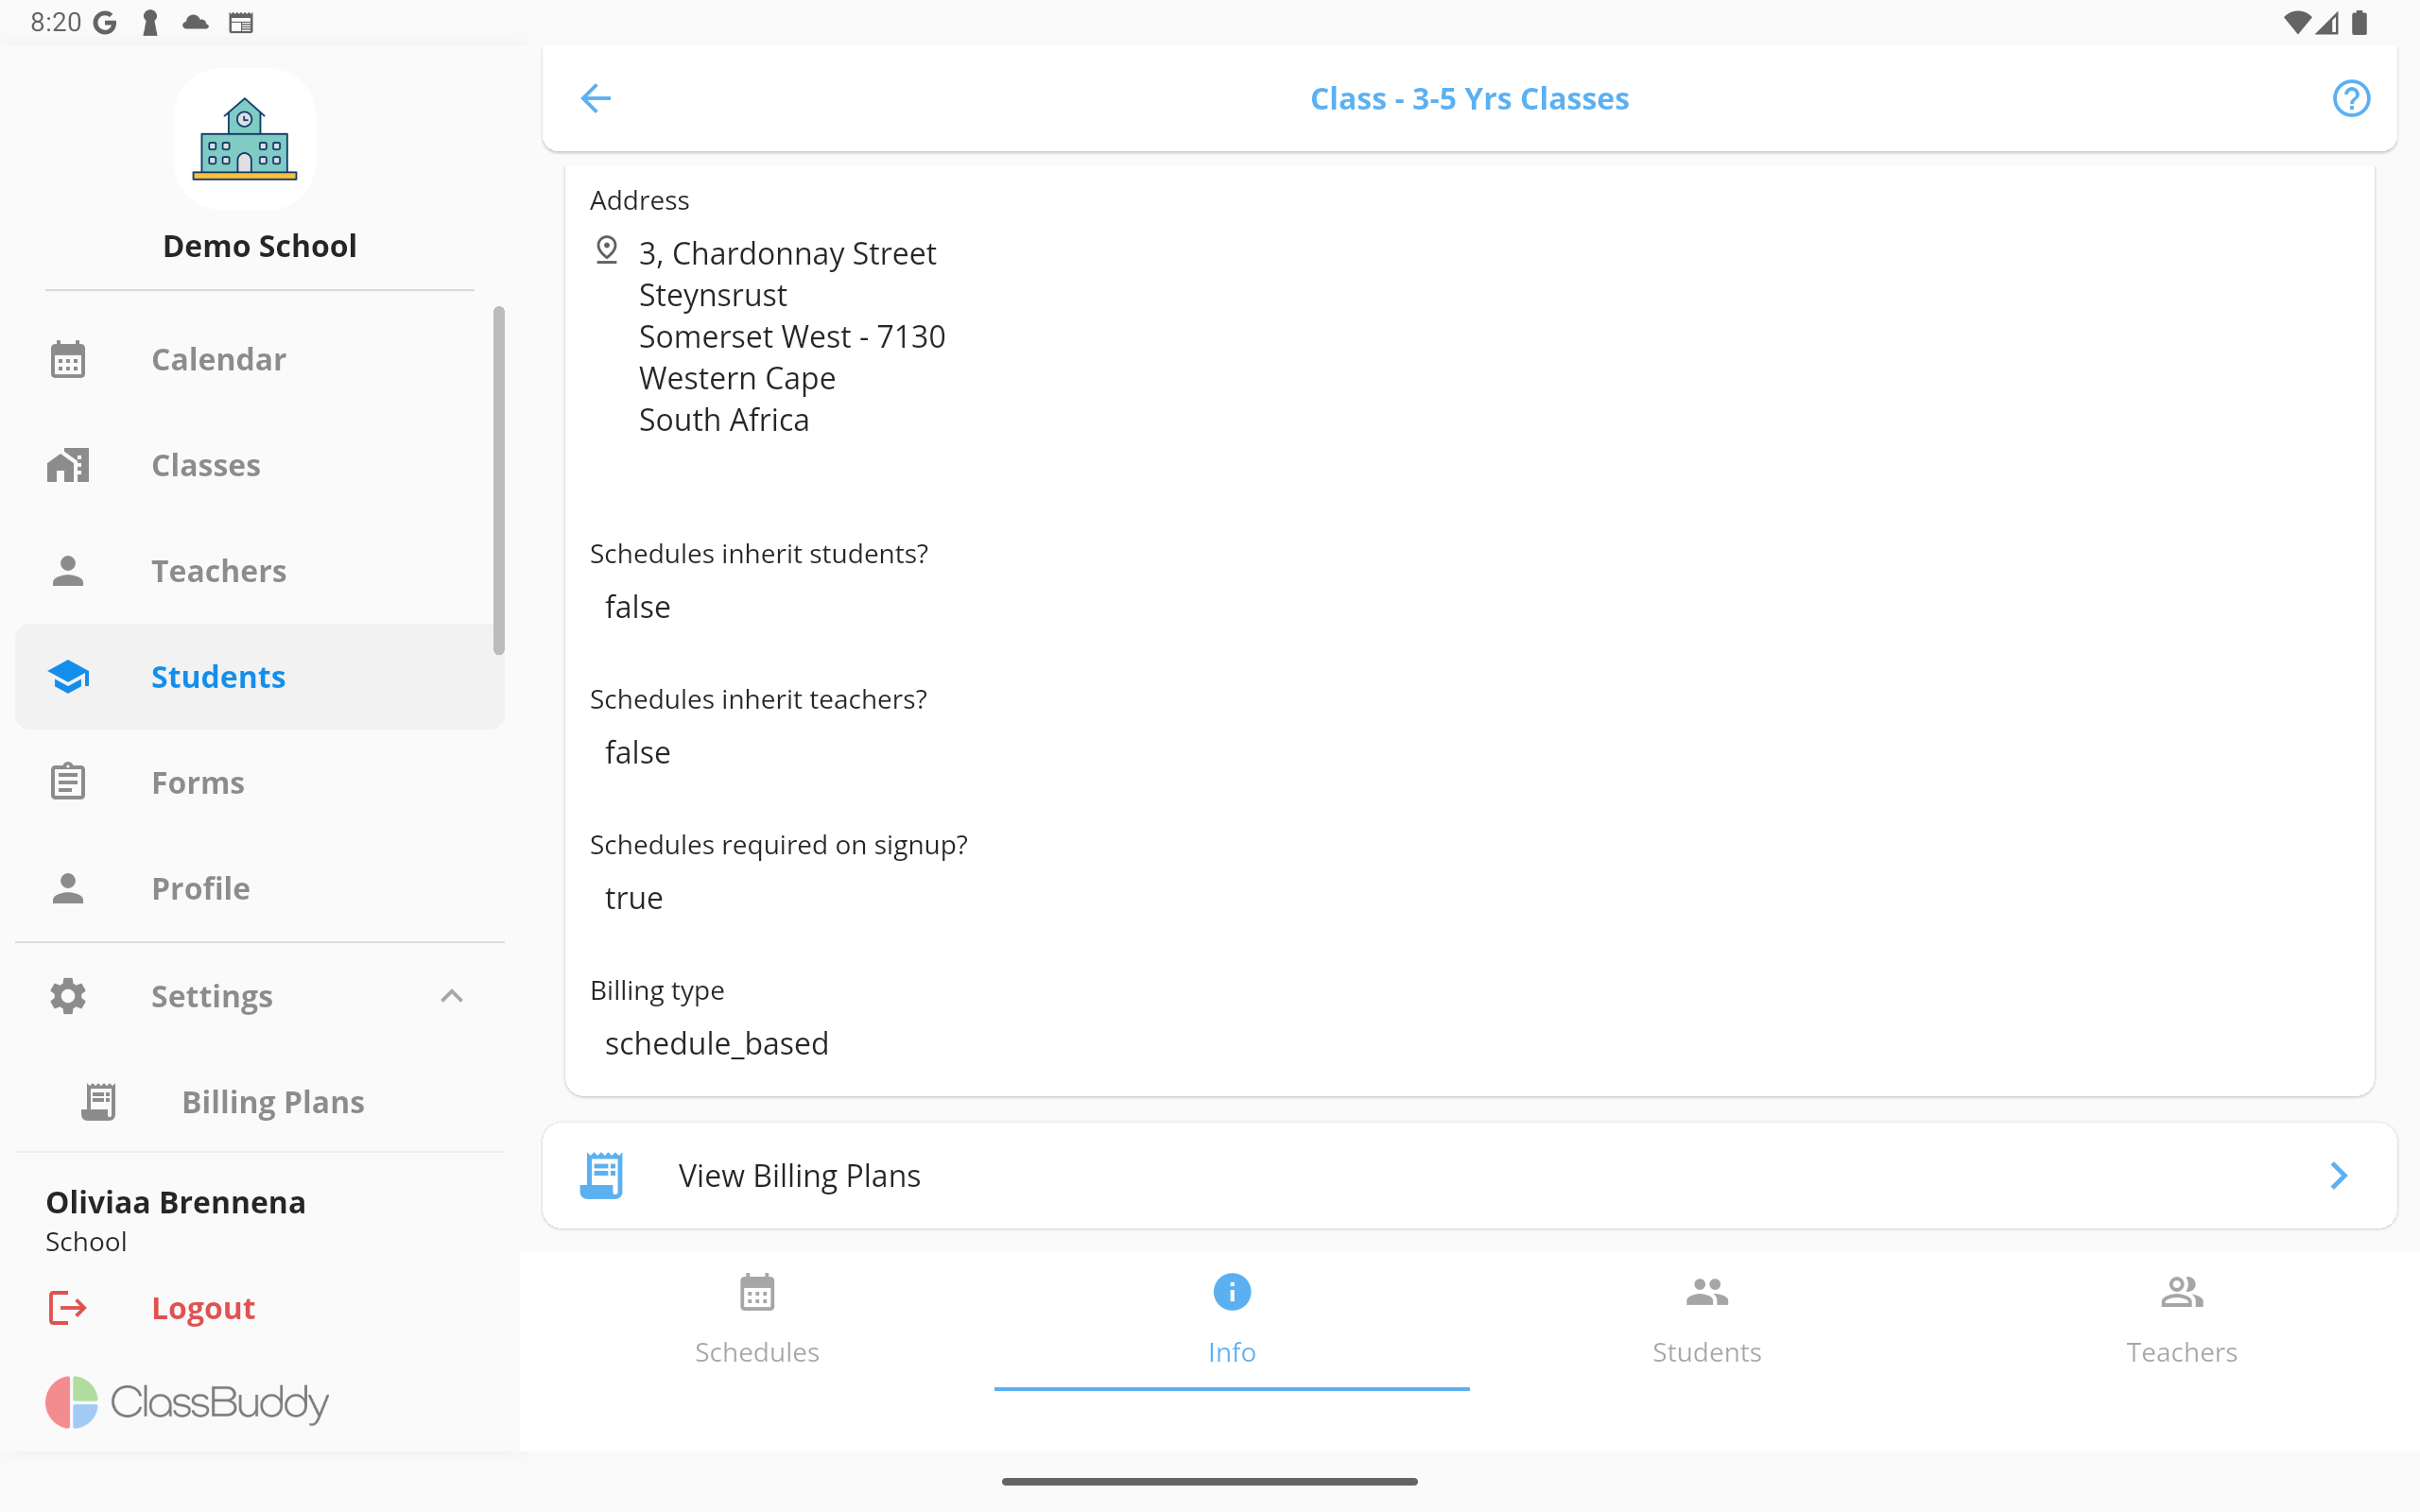
| Schedules inherit students? | When on, any student added to the class is automatically linked to all schedules under it |
| Schedules inherit teachers? | When on, any teacher added to the class is automatically linked to all schedules under it |
| Schedules required on signup? | When on, students must select a schedule when enrolling via a sign-up form |
| Billing Type | Fixed — students are billed a flat amount regardless of how many sessions they attend. Schedule Based — students are billed based on the number of sessions attended. Must match the billing type of any billing plan you link to this class. |
- Tap Submit to create the class.
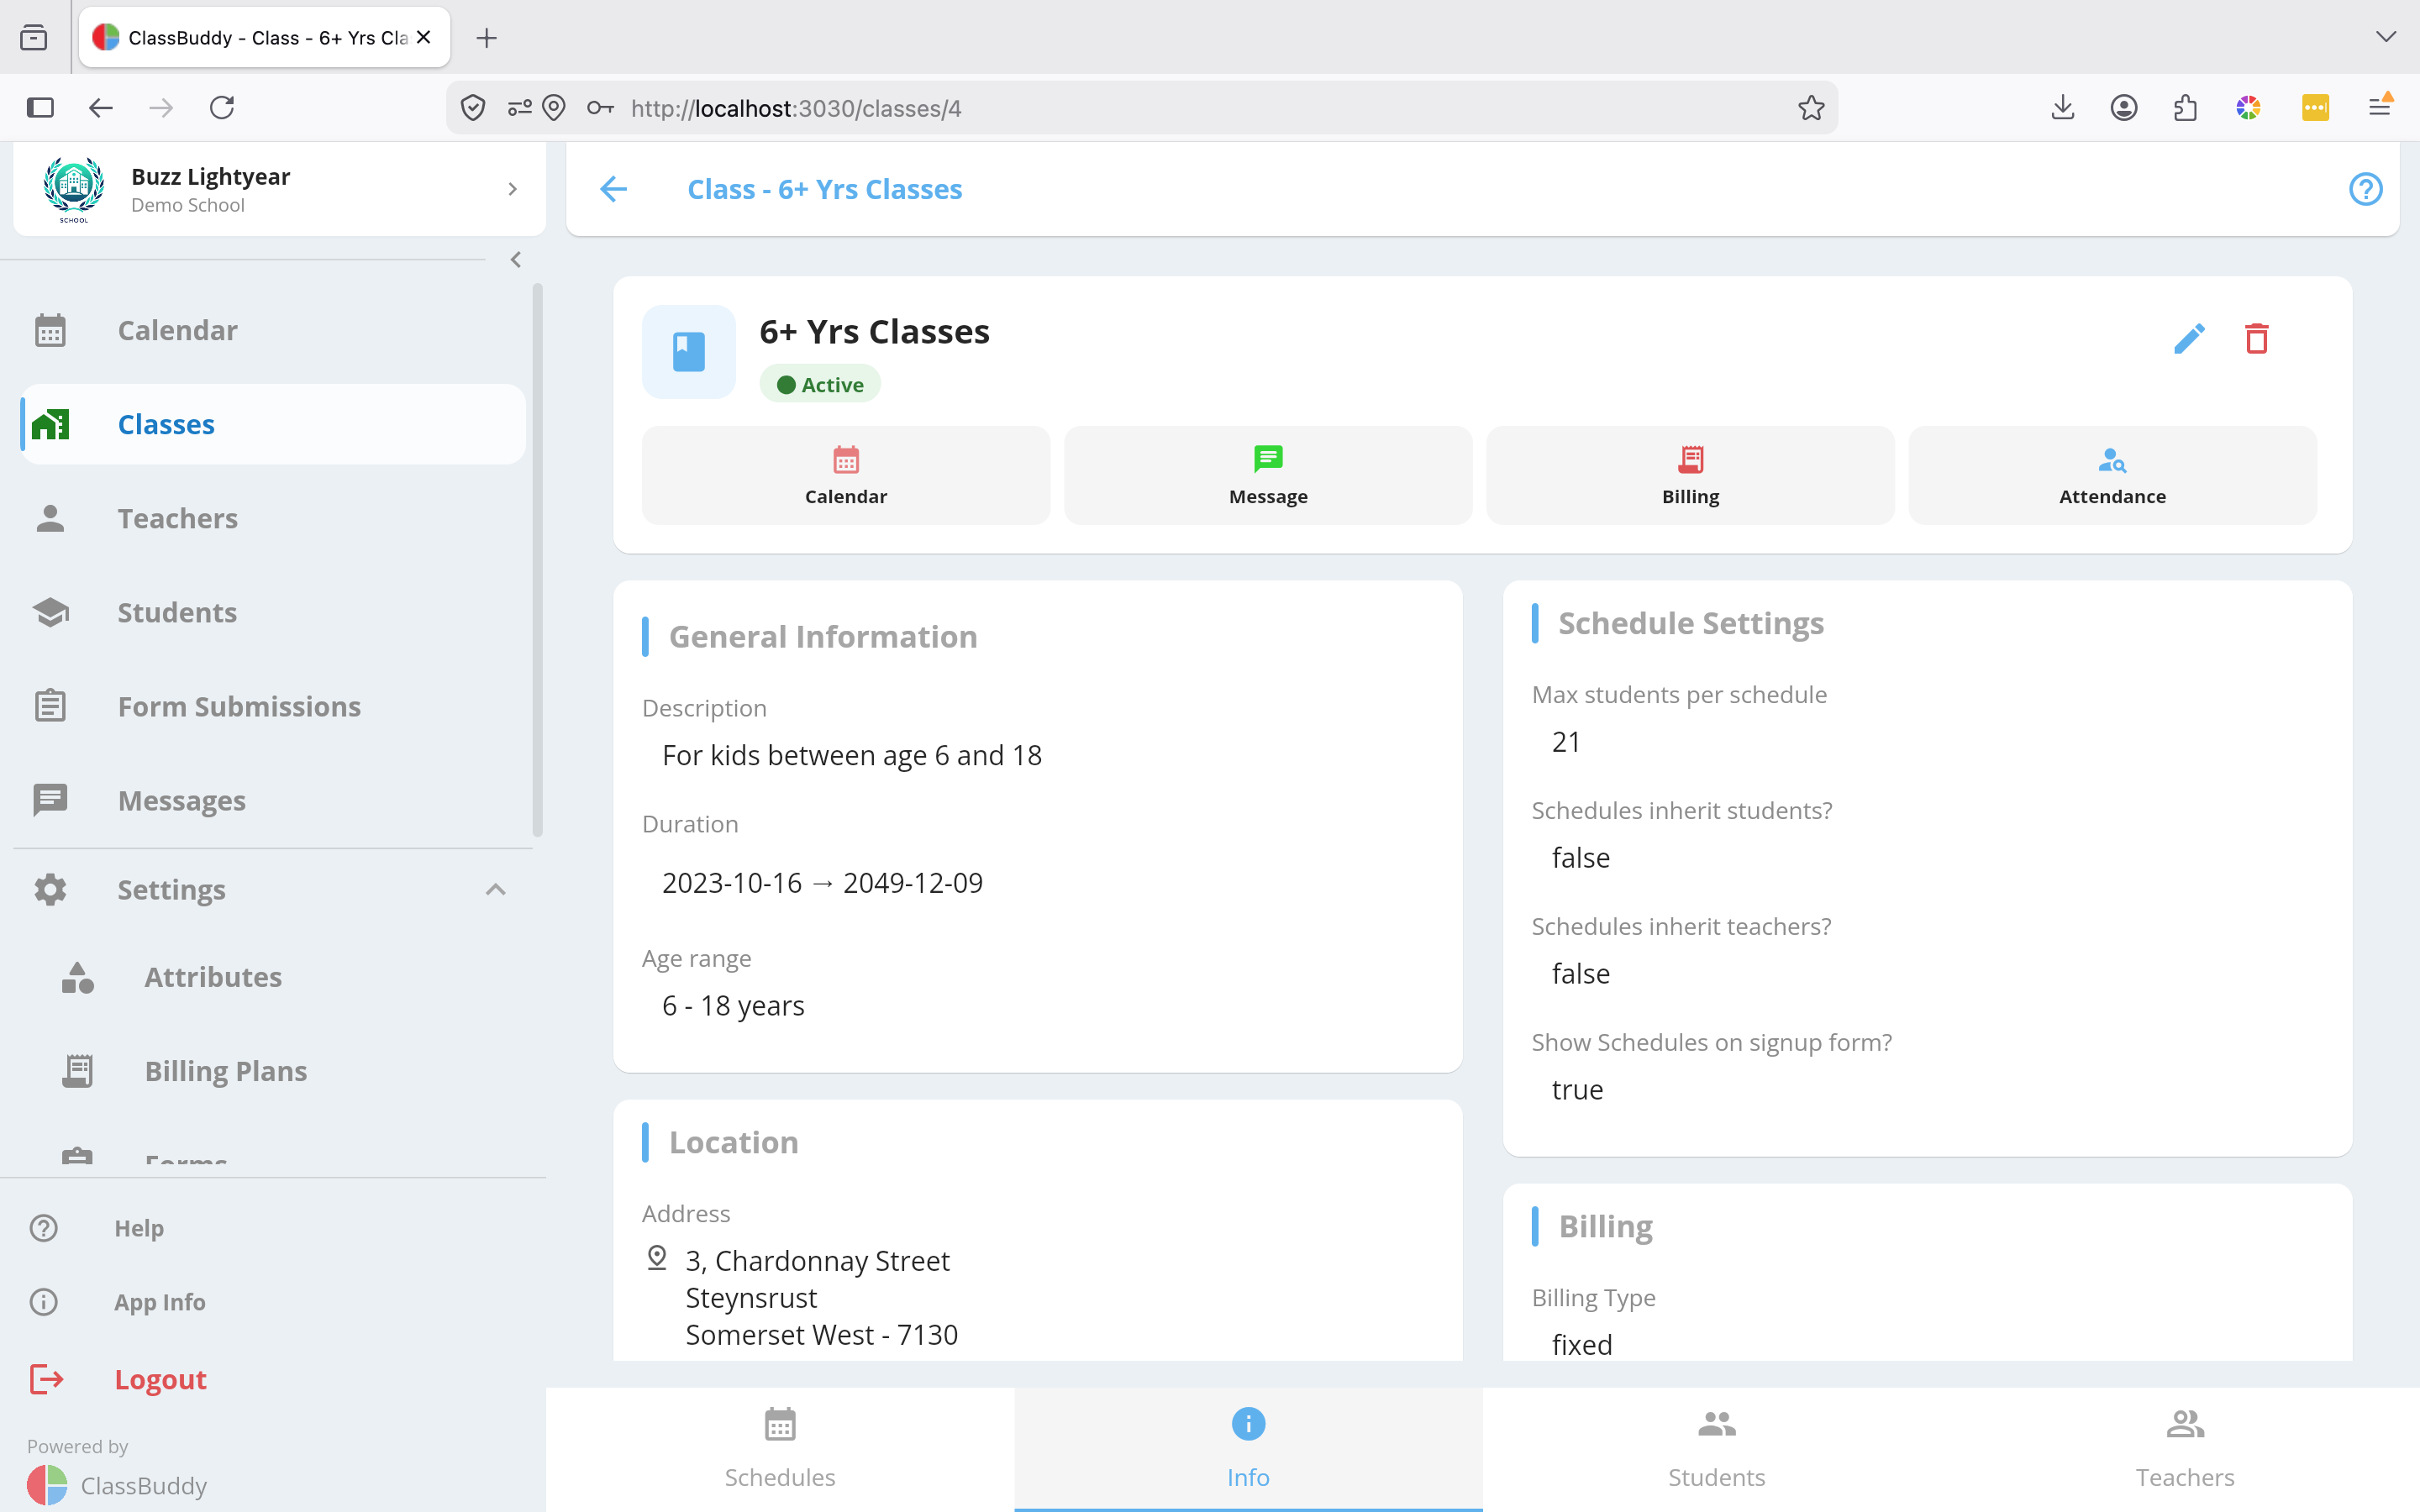
Class Tabs
When viewing a class, four tabs are available:
| Tab | Contents |
|---|---|
| Schedules | All schedules for this class |
| Info | Class details, billing plans, and actions |
| Students | Students enrolled in the class |
| Teachers | Teachers assigned to the class |
Editing a Class
- Open the class and go to the Info tab.
- Tap the menu icon (three dots) in the top-right corner and select Edit.
- Update any fields and tap Submit.
You can also toggle the class Active/Inactive from the edit form. Inactive classes are hidden from sign-up forms and no new students can be enrolled.
Deleting a Class
- Open the class and go to the Info tab.
- Tap the menu (three dots) and select Delete.
- Confirm the deletion.
Deleting a class also removes all its schedules and student/teacher links. This cannot be undone.
Class Calendar
From the Info tab, tap Calendar to open a filtered calendar view showing only the scheduled events for that class. This is useful for checking a class's full schedule at a glance without the noise of other classes.
Attendance
There are two ways to take attendance for a class:
- From the class list — tap the attendance icon (person with checkmark) next to the class row to mark attendance for today.
- From the Info tab — tap View Attendance to see the full attendance history for the class across all dates, and drill into any session to update it.
Billing Plans
From the Info tab, tap Billing to manage which billing plans are linked to this class.
Use the edit icon to update the linked plans.
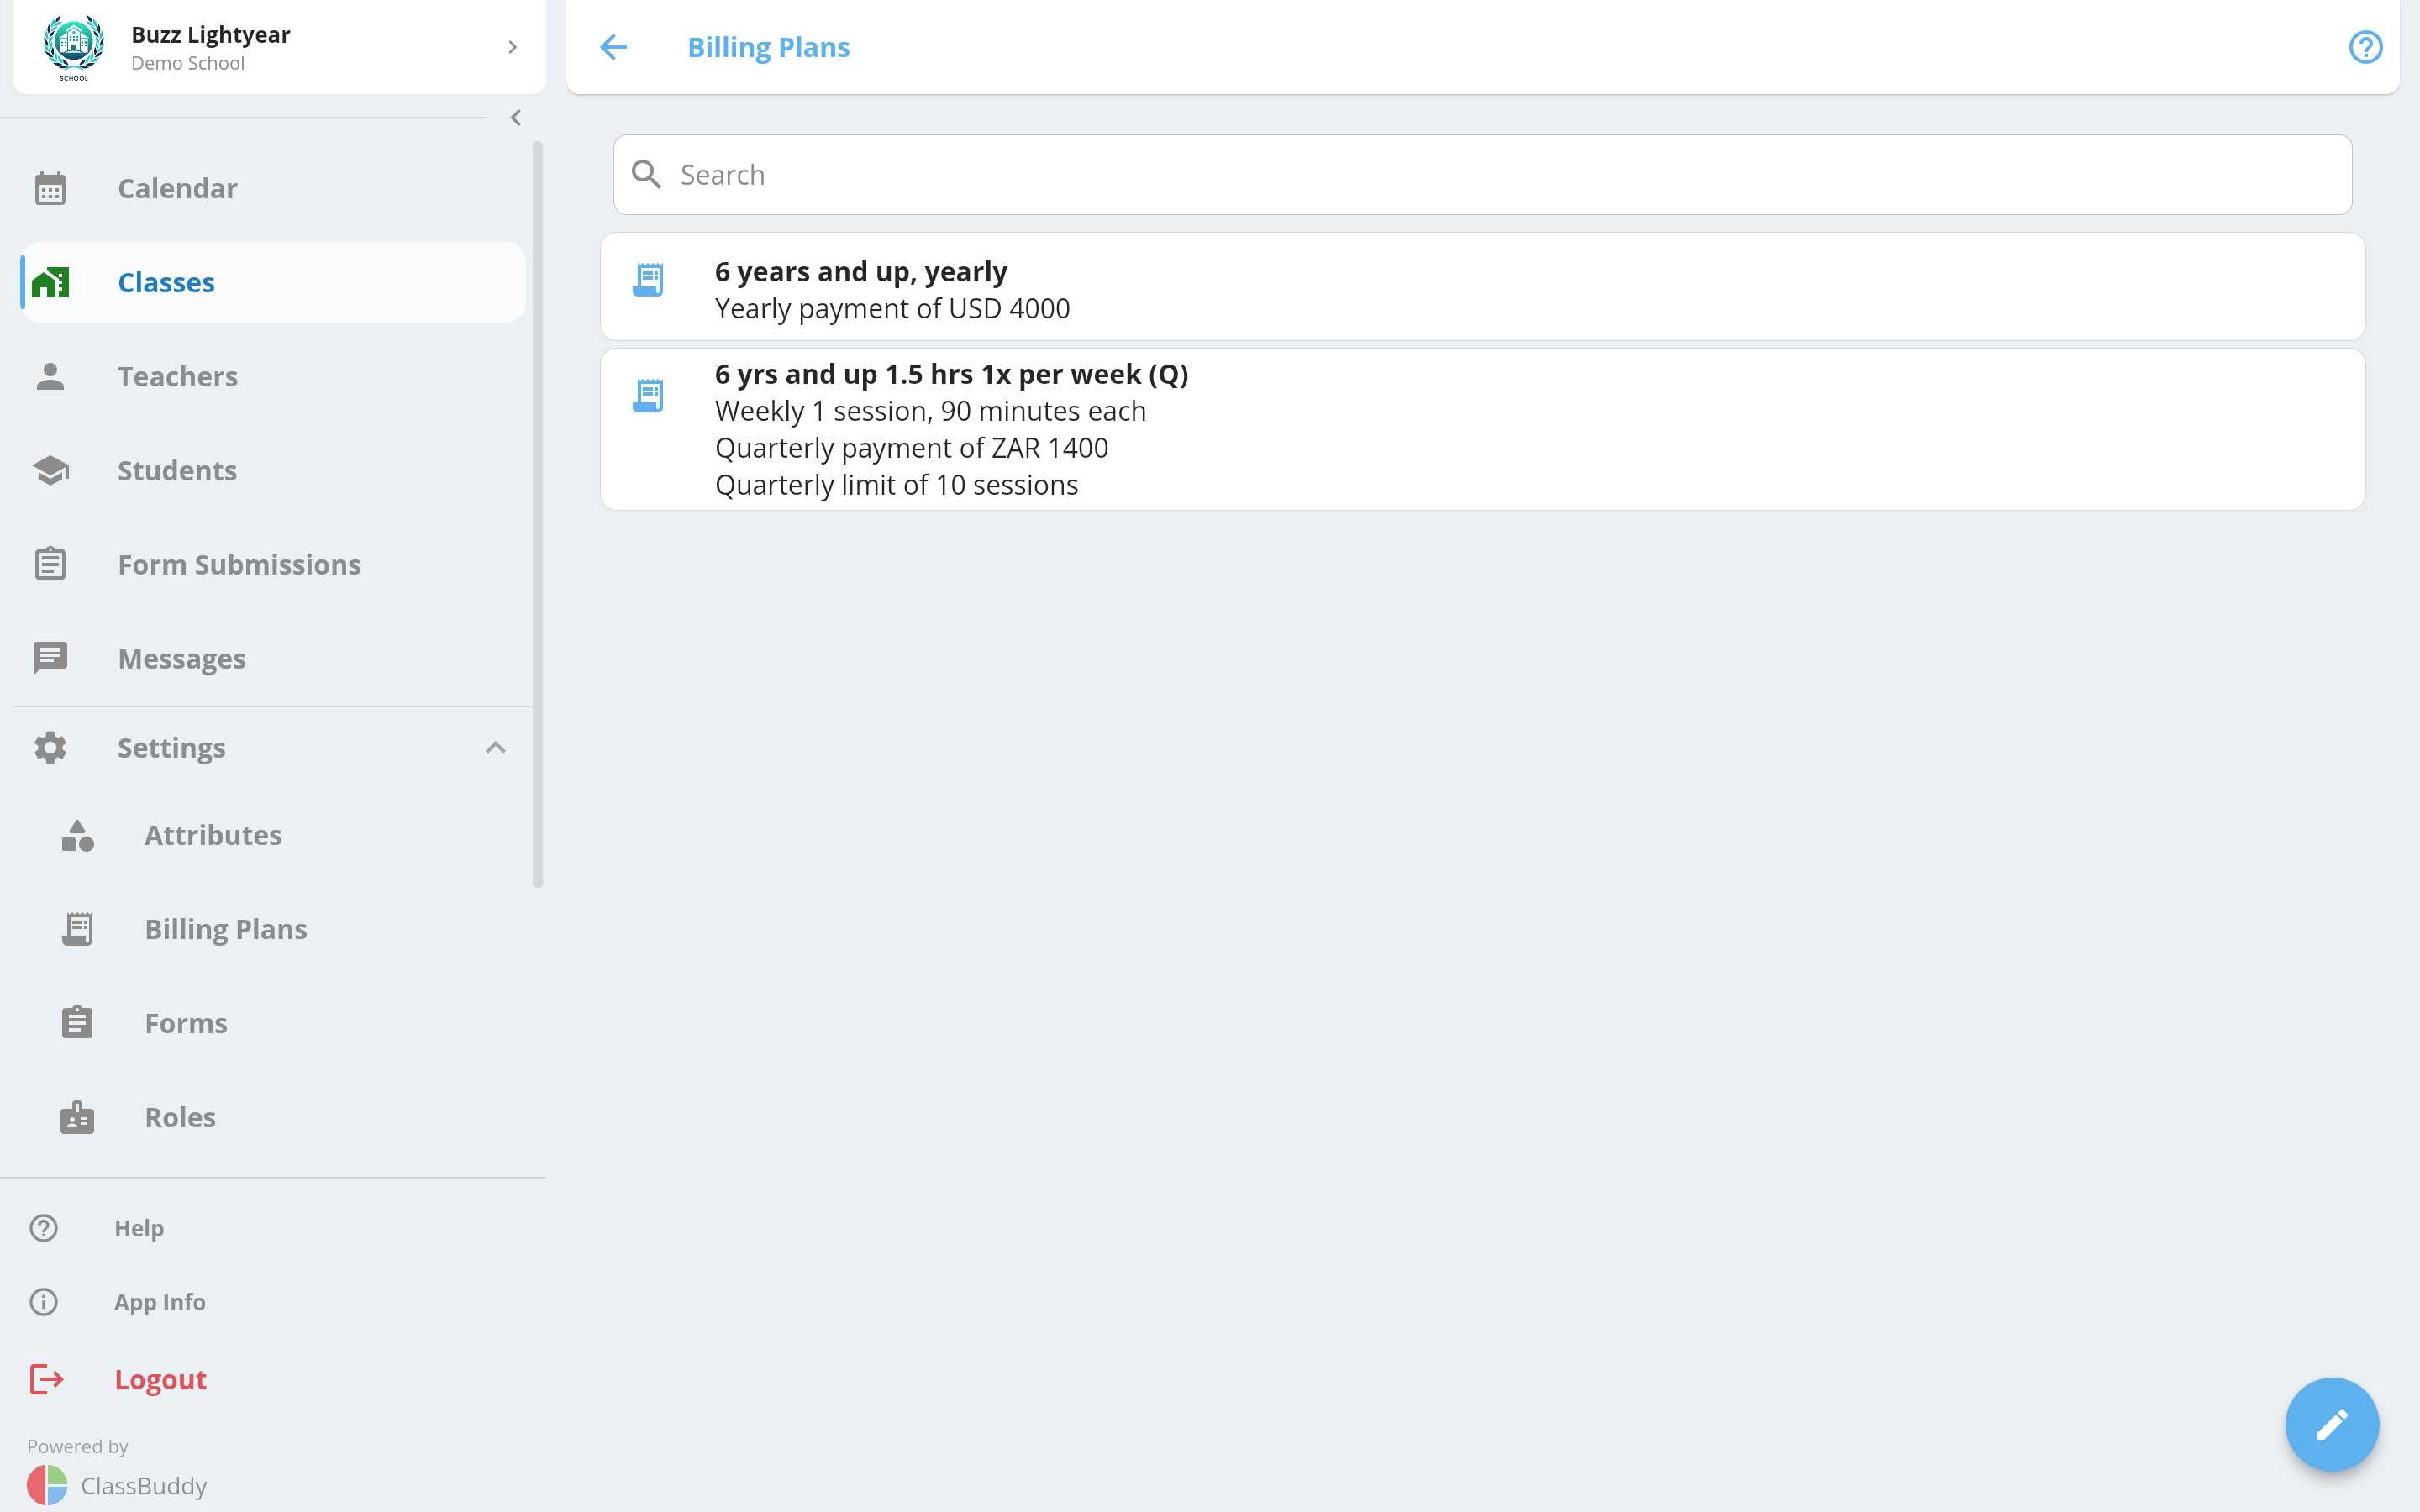
A billing plan must be linked to a class before it can be assigned to a student in that class. The billing type of the plan must match the billing type set on the class.
Managing Students
There are two approaches to linking students to a class — choose based on how your school is structured:
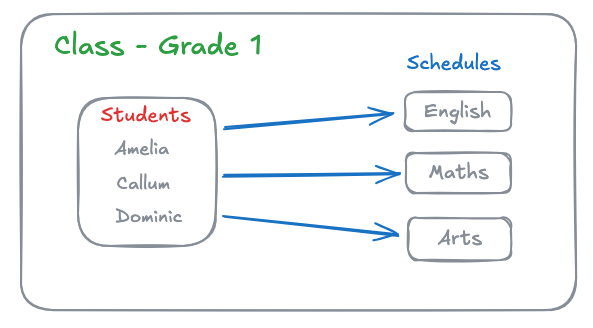
Add at class level — students are linked to the class and automatically inherit all its schedules. Best for schools where all students in a class attend the same time slots (e.g. a grade school).
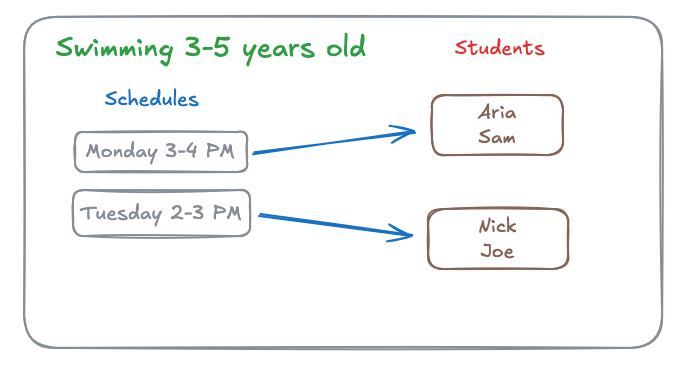
Add at schedule level — students are linked directly to individual schedules. Best for schools with multiple time slots where different students attend different slots (e.g. a swimming school with morning and afternoon sessions).
You can also combine both approaches.
Adding students to a class
- Open the class and go to the Students tab.
- Tap the + button.
- Search for and select students in the popup.
- Tap Add Selected Students.
Removing a student from a class
- Open the class and go to the Students tab.
- Find the student and tap the menu (three dots) next to their name.
- Select Remove from Class and confirm.
Editing a student's schedule assignments
To control exactly which schedules a student in this class attends:
- Open the class and go to the Students tab.
- Tap the edit (pencil) icon next to the student.
- Select or deselect the schedules this student should be assigned to.
- Tap Save.
Changing schedule assignments may trigger a billing plan update if the new number of schedules is not covered by the student's current plan.
Managing Teachers
Adding teachers to a class
- Open the class and go to the Teachers tab.
- Tap the + button.
- Search for and select teachers in the popup.
- Tap Add Selected Teachers.
Removing a teacher from a class
- Open the class and go to the Teachers tab.
- Find the teacher and tap the menu (three dots).
- Select Remove from Class and confirm.
Editing a teacher's schedule assignments
To control which schedules a teacher in this class is assigned to:
- Open the class and go to the Teachers tab.
- Tap the edit (pencil) icon next to the teacher.
- Select or deselect the schedules for that teacher.
- Tap Save.
Managing Schedules
The Schedules tab lists all schedules for the class, sorted by frequency, then day, then start time. Tap any schedule to open it.
To create a new schedule, tap the + button from the Schedules tab. See the Schedules guide for full details on creating and managing schedules.
Messaging Class Members
- Open the class and tap the menu (three dots) in the top-right corner.
- Select Message.
- Compose and send your message. It will be delivered to all students and teachers linked to the class.